Cleaning a tumble dryer on a regular basis doesn’t just make the machine run smoother and work more efficiently, but it also makes the appliance safer to use.
So, how do you clean a tumble dryer thoroughly? Read on to discover a step-by-step guide to cleaning a tumble dryer.
Why Is It Important to Clean a Tumble Dryer?
It’s absolutely essential that you clean your tumble dryer out regularly. Here are a few reasons why you need to be carrying out this cleaning exercise:
- Protects the machine.
- Limits potential faults from occurring.
- Makes drying clothes more hygienic.
- A clean tumble dryer that runs efficiently can save you money in the long term.
How Do You Know It’s Time to Clean a Tumble Dryer?
You need to be cleaning a tumble dryer on a regular basis anyway. And certain parts in the dryer need to be cleaned after every single use (filter, for example).
But if you’re still not convinced your dryer needs to be cleaned, here are some signals to look out for:
- There’s a funny smell coming from the tumble dryer.
- The tumble dryer isn’t drying laundry as it should.
- There are dirty patches in the tumble dryer and on the seals.
- The tumble dryer is taking longer than usual to dry clothes.
- The tumble dryer isn’t heating up.
- The power may trip when the tumble dryer is on.
What Tools Do You Need to Clean a Tumble Dryer?
Before you start cleaning your tumble dryer you should gather your cleaning tools. Here are the tools you’ll need to successfully complete your job:
- Water
- Vacuum cleaner
- Cloths
- Multipurpose cleaner
- User handbook
- White vinegar
- Spray bottle
Tips to Keep in Mind When Cleaning a Tumble Dryer
Here are just a few points to think about when you’re going to clean your tumble dryer:
- Wait for the dryer to cool down before you clean it.
- Always unplug the tumble dryer from the power socket before starting to clean it.
- You must replace all parts that you pull out of the dryer before using it again (filter, heat exchanger and water reservoir, for example).
- Take your time.
- Leave your tumble dryer door open after cleaning the appliance, this allows fresh air to go into the machine.
- Consult your user manual before starting any cleaning exercise.
How To Clean A Tumble Dryer – Step By Step Guide
Not all of the steps below will apply to every tumble dryer, so skip the steps that don’t relate to your dryer.
Follow the steps below to clean your dryer.
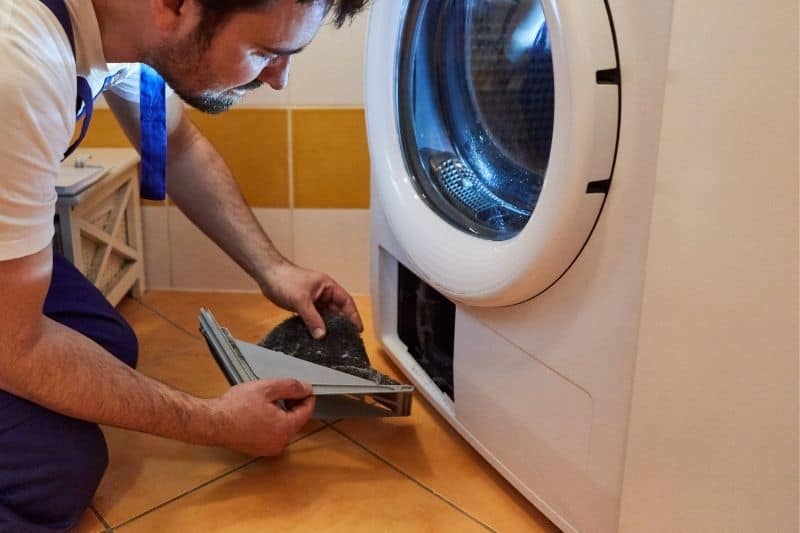
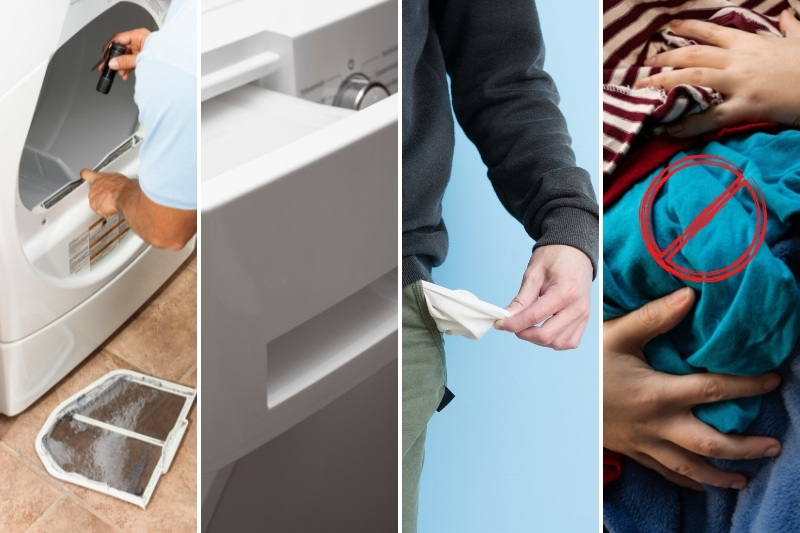
Step 1: Lint filter
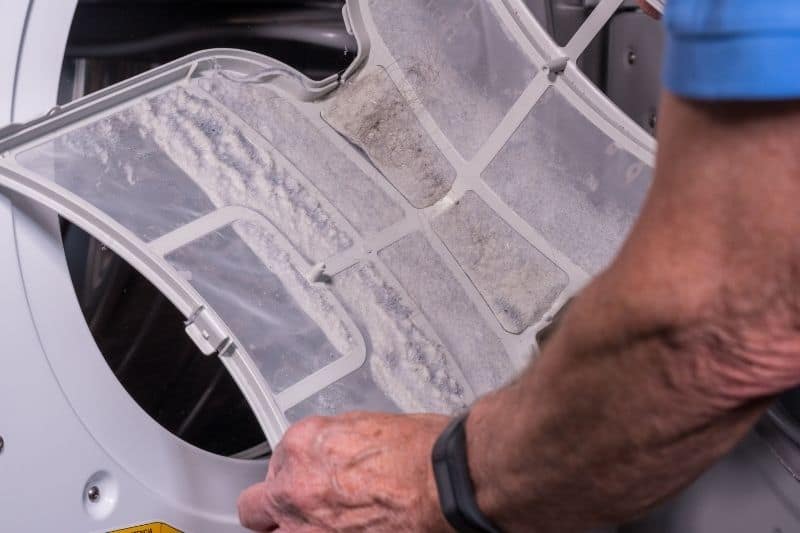
The lint filter is located just inside your tumble dryer’s door. It’s imperative that you clean this section because a clogged filter can hinder how a dryer performs.
And if you don’t maintain this part, you run the risk of overheating your dryer, because it can’t work effectively under the strain.
To clean the filter, you just need to remove it from the machine, and use your fingers to scrape along the filter to collect dirt and fluff. You can also hoover the filter to pick up any last bits of dust.
In some cases, but not all, you can run a filter under a tap to clean it. But you will need to make sure that the filter is completely dry before returning it to the machine.
Also, not all manufacturers like you doing this, so check your user manual for further guidance.
Tip: Empty the lint filter after every drying cycle.
Step 2: Lint filter’s spot
When the lint filter is out of the tumble dryer, you can grab the crevice tool on your vacuum cleaner, and start hoovering inside the slot where the lint filter lives.
Try to pick up as much additional dirt as you can. Keep a look out for stray pieces of fluff and general grime!
In addition to the above, you can also use a thin, flexible duster to clean the gap where the lint filter is kept. The AIEVE Radiator Brush would be the ideal tool to have for this job, and would complement your vacuuming.
The flexible nylon bristles are strong, and can pick up dirt from hard-to-reach areas inside the machine, like where the hoover couldn’t get to.
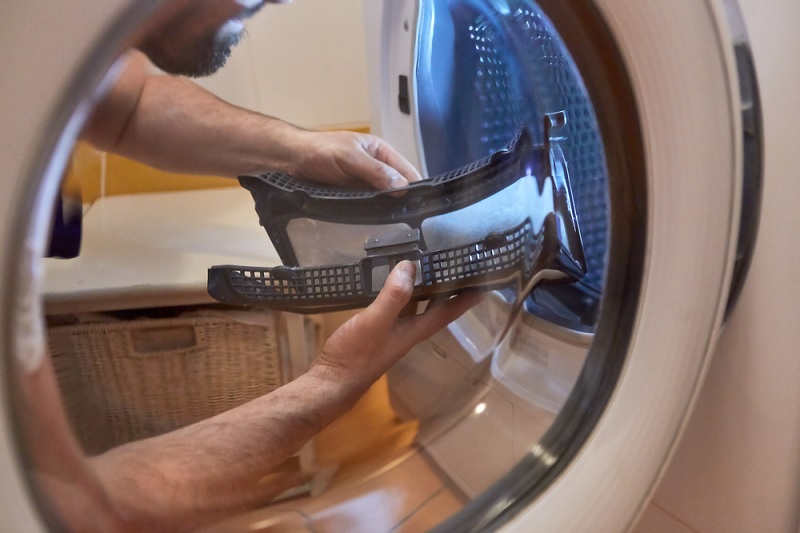
Step 3: Heat exchanger (condenser/heat pump dryers only)
As the heat exchanger takes the hot steam from the drum and turns it into water, little bits of fluff and dirt get caught up in the exchange. This dirt, if not cleaned away, starts to mount up in the heat exchanger, and impacts how well the dryer works.
To clean the heat exchanger all you need to do is locate the heat exchanger in your machine, and remove it from the appliance. Heat exchangers are usually located near the front of tumble dryers and are normally hidden behind a panel.
In order to remove the heat exchanger, you’ll likely have to unlock some levers and pull the part out. Although, you should check what latches you need to undo by reading your user manual.
Once the heat exchanger is out of its home, you just need to hold it under a cold water tap and clean it. You should try and remove obvious pieces of dirt along the way.
You need to allow the heat exchanger to dry before replacing it.
This little exercise should be completed on a monthly basis. However, if you use your tumble dryer a lot, you may need to clean the heat exchanger more frequently.
Step 4: Heat exchanger’s spot (condenser/heat pump dryers only)
With the heat exchanger out of the way you can check its home for dirt. If you see any grime, you can clean it off with a damp hot cloth, or hoover bits of fluff away.
Step 5: Water reservoir (condenser/heat pump dryers only)
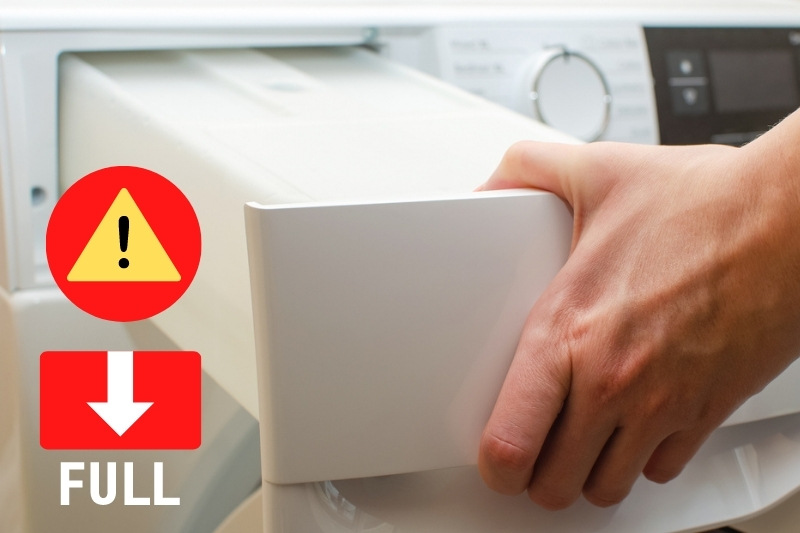
It’s essential that you empty the waste water out of the dryer’s water reservoir. A full container might cause the dryer to cut out because it can’t function effectively.
To clean out a water reservoir you just need to pour the water down the sink.
On a lot of tumble dryers there’s a flashing warning light that tells you that you need to empty the water tank.
Tip: Before you use your dryer, have a look to see if your water reservoir is empty. If the reservoir is half full, quickly empty the water away. If you leave the container half full the tumble dryer will stop mid-way through a drying cycle and will ask you to empty the tank.
Step 6: Water reservoir’s spot (condenser/heat pump dryers only)
With the water reservoir itself out of the way, have a quick look inside the space where the container is kept, and remove any dirt you see.
It’s unlikely that there’ll be a lot of dirt here, so all you’ll need to do is wipe the space down with a warm, damp cloth.
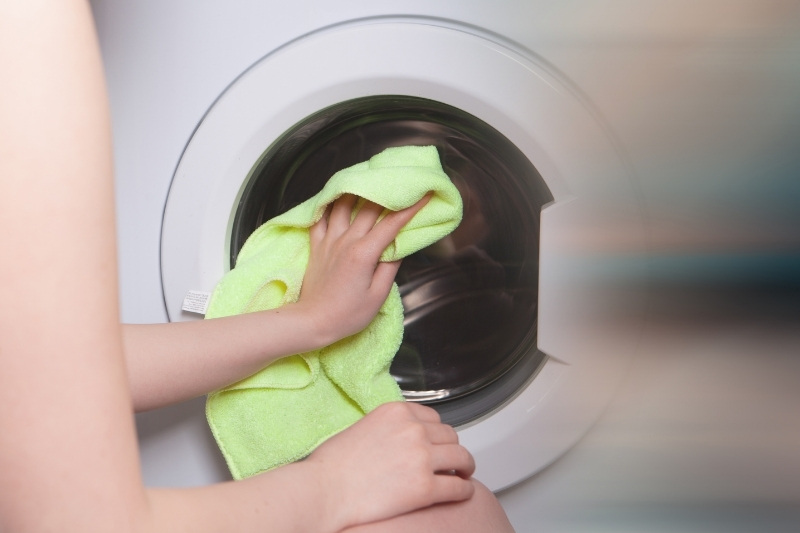
Step 7: The drum
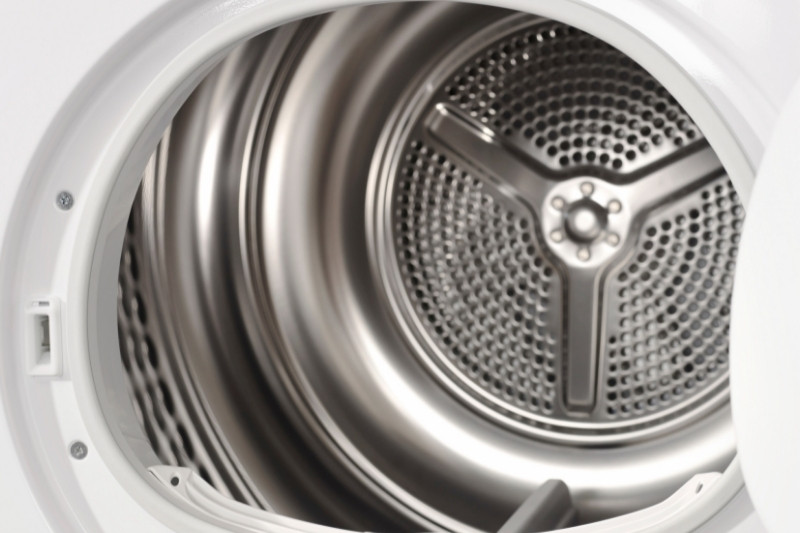
The drum inside your tumble dryer may look quite clean, but that doesn’t mean that you shouldn’t clean it. There’ll be a lot of hidden dirt here that needs to be cleaned away, because this grime can attach itself to your clean clothes as they get dried.
To clean the drum, spray some diluted white vinegar onto the drum, and rub the insides down with a microfibre cloth.
Mix one part white vinegar to three parts water in a spray bottle to create your cleaning solution.
Step 8: The sensor (humidity sensor)
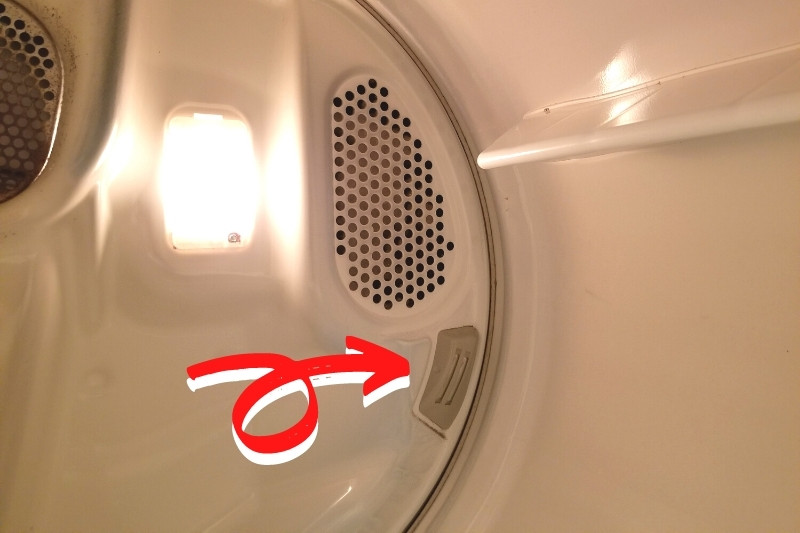
A sensor in a tumble dryer regulates the temperature inside the machine, and it can end a drying cycle early if it senses that the clothes are dry.
Over time, sensors become encrusted with grime and lint, and they don’t function as they should.
Luckily you can rectify this issue by cleaning the faulty sensor. Simply wipe the sensor down with some diluted white vinegar.
Step 9: Door and seal
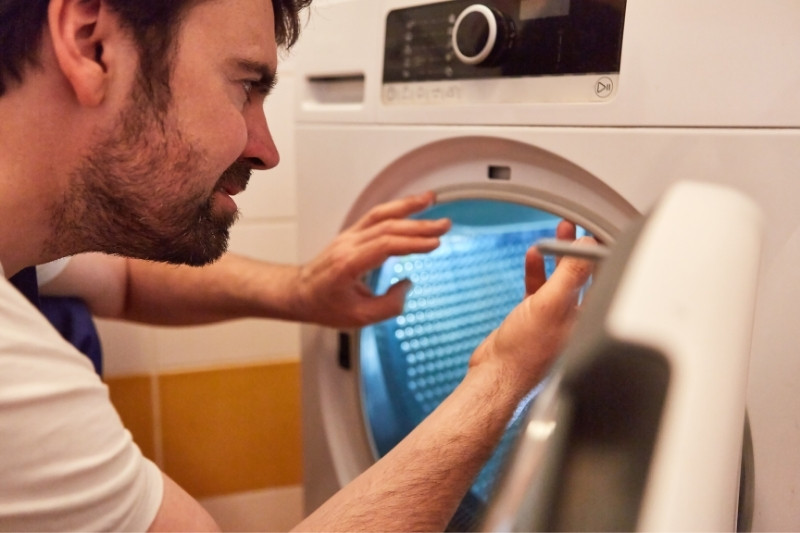
The seal around your tumble dryer’s door is basically a haven for bacteria to breed in, which is why you must clean this area. Failing to maintain this space will eventually lead to the seal changing colour, becoming smelly and even breaking down.
The door, if not cleaned can also harbour a lot of muck too, and this can make it a little stinky!
To clean the seal and door simply spray a diluted white vinegar solution onto the area, and wipe the surfaces down with a microfiber cloth.
To create the solution just mix one part white vinegar to three parts water in a spray bottle.
Step 10: Hose (vented dryer only)
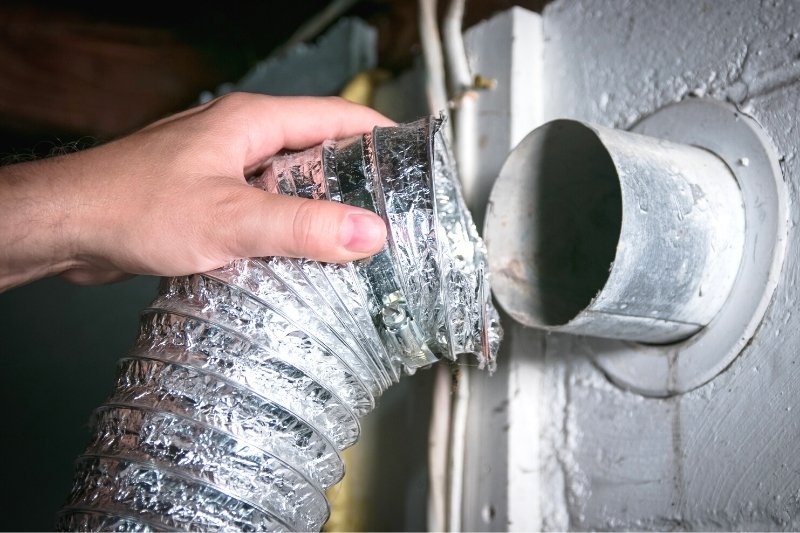
Clogged or damaged vented hoses can hinder how a tumble dryer performs, not only does a blocked hose make drying times much longer, but the quality of the drying exercise might be bad too.
To clean a hose just remove any obvious bits of dirt and fluff that are causing an obstruction.
And in the event that your hose is damaged in some way, you will need to replace it.
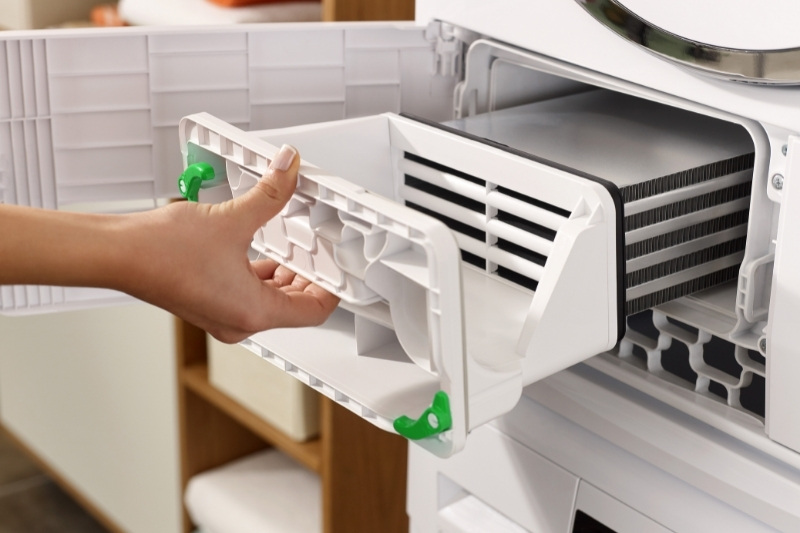
Step 11: Lower filter (heat pump dryer only)
If you have a heat pump tumble dryer it’s imperative that you remember to clean its lower filter. Not clearing out the filter will lead to longer drying times, costly drying cycles and condensation.
You will typically find the lower filter located near the heat exchanger in your tumble dryer. And to clean it out you will need to remove it by unlocking some levers (see your user manual for specific details relating to your model), and pulling it out.
Once the lower filter is out you need to remove any fluff and dirt that you can see. Then you need to rinse the filter under some water. You’ll know the filter is really clean when the water runs clear.
You cannot replace the lower filter until it is completely dry, so you might have to wait a few hours.
You need to clean this particular filter out every 10 drying cycles.
Step 12: Back panel
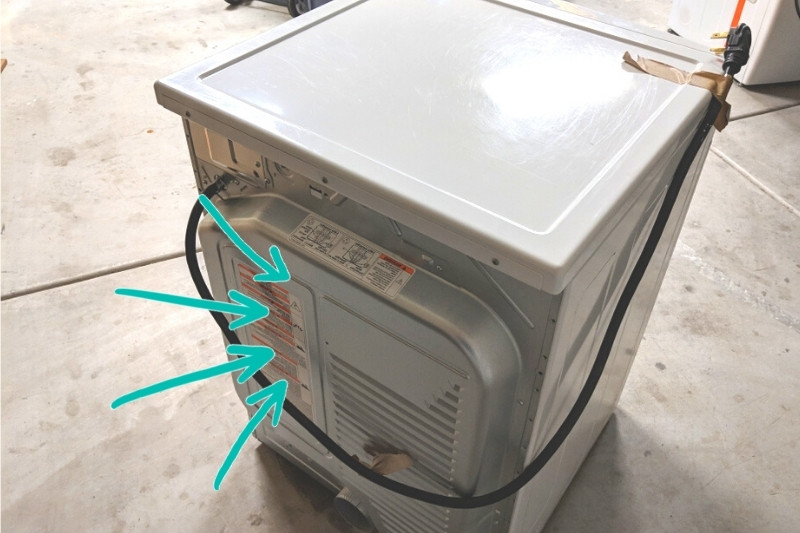
Dust and fluff somehow manage to get everywhere in a tumble dryer, and the back of the machine doesn’t escape this misfortune!
A build of fluff in the back of a tumble dryer doesn’t just affect how the machine works, but it can also be a major hazard. So, grime really does need to be cleaned away from this section as soon as possible.
To clean this section of your dryer just spin the dryer around, so its back is facing outwards. Then unscrew the back panel and start hoovering all the fluff away. Try and stick to using small tools for this job as the work can be quite intricate.
If you happen to remove, dislodge or damage something when completing this exercise, remember that you will need to rectify the issues before using the tumble dryer again.
When you’re done you need to screw the back panel back onto the dryer.
Step 13: External cleaning
The final step on your cleaning adventure should be to clean down the exterior of your tumble dryer. This includes the sides and the outside of the door.
You can wipe these surfaces down with a hot damp cloth. And if there’s something mucky on the surface and it needs a little more cleaning power, you can squirt some multipurpose cleaner onto it to get rid of it.
In addition to the above, if you’ve pulled your tumble dryer out of its slot, wherever that may be, you should clean the floor the dryer normally sits on. You’ll be surprised to see how much dust, fluff and food gets under the dryer!
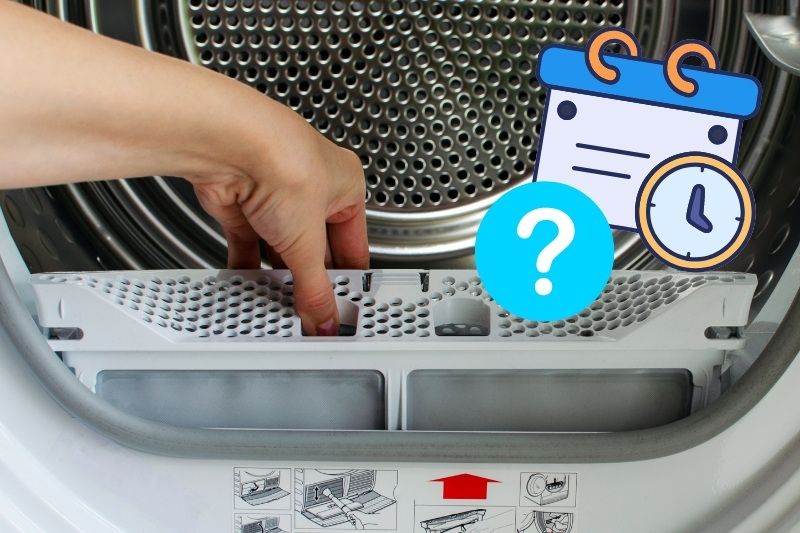
How Often Should You Clean a Tumble Dryer?
You should clean your tumble dryer out completely every month. However, you should pull the lint filter out of the tumble dryer at the end of every cycle and clean it. You also need to empty the water reservoir on a regular basis.
In addition to this, if you spot obvious dirt inside the machine, like a sweet has melted onto the drum, you should clear it away immediately. This dirt will only transfer itself onto your other clean laundry.
How to Keep a Tumble Dryer Clean
So, as you might’ve guessed already, tumble dryers need to be cleaned. But what’s more important is keeping your tumble dryer cleaner for longer, so you can relish in your hard work. Here are a few tips to help you keep you tumble dryer spotless for longer:
- Do regular spot cleans to keep on top of the cleaning.
- Always clean the lint filter out after every use.
- Always empty the water reservoir.
- Empty pockets before you dry clothes – there could be a sneaky sweet stuck in a pocket and this could wreak havoc in your dryer!
- Inspect your tumble dryer on a regular basis – check the power cable, the exterior, the door and filter for any damage, for example.
- Try not to overload the tumble dryer as this only puts stress on the machine.
- Make sure the dryer has enough ventilation.

Bethan has a passion for exploring, reading, cooking and gardening! When she’s not creating culinary delights for her family, she’s concocting potions to keep her house clean!


")