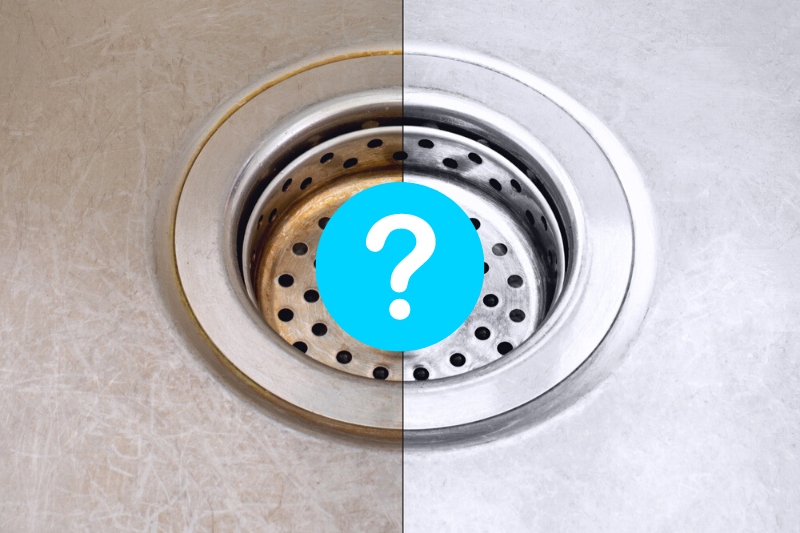
Metal tools, bikes, garden furniture and kitchenware, can all be plagued by rust! And although the problem isn’t the worst thing in the world, the unsightly blemishes left behind by rust are an eyesore!
Not to mention that rust can transfer itself onto clothes and soft furnishings. So, you have to get rid of it as soon as possible. Otherwise, it’ll wreak havoc!
So, how do you remove rust from metal surfaces? Read on to learn more – you might be surprised to hear how easy this cleaning activity is!
Tips to Consider When Removing Rust from Metal
Here are a few tips to keep in mind:
- Always wear protective gear when treating a rusty item. Goggles and gloves are essential.
- Take your time. Removing rust isn’t always going to be a straightforward task, so don’t rush through the method just to get the job done!
- Don’t worry if you have to repeat a method more than once to remove all the rust from an object.
- Make sure the solution you plan on using won’t strip any protective coatings off your metal item.
- If using an off-the-shelf rust remover or converter, follow the instructions on the item’s packaging. Follow the steps and use the correct dose!
- Keep kids and pets out of the room/area when you’re working on a rusty item.
- Open plenty of windows so there’s sufficient ventilation in the room you’re working in.
- If need be, work outdoors.
- Remove obvious and loose chunks of rust from an object before treating it. Use a toothbrush to do this.
- Always test your chosen cleaning solution out on a discreet patch of metal before you use it properly.
- Protect your workstation from rust and chemicals.
- Always rinse your cleaning solution off and pat your metal item dry after you’ve treated it.
Removing Rust Using a Homemade Solution
Below you’ll find several cleaning methods that use goodies that you have at home already! Most methods are straightforward to use, cost very little and yield good results.
Option 1: Salt and lemon juice

If you’ve got relatively new and not-so-stubborn rusty blemishes on your metal item, you can try this method (it works well on kitchen utensils, for example).
Simply spread an even layer of salt directly onto the rusted item (make sure you cover the entire metal surface). Then squeeze lemon juice on top of the salt and wait 30 minutes to an hour.
When the timer rings out, scrub the rusted metal surface with the lemon half you squeezed the juice out of. Then scrub the surface with a scourer, rinse the metal surface clean and dry the metal object.
You can repeat the steps above if there is still rust on the piece.
Pros: This is a relatively cheap and easy-to-try-out method.
Cons: This method can be a little fiddly and dangerous, especially when handling sharp objects like knives, so wear protective gloves at all times.
Option 2: Bicarbonate of soda paste
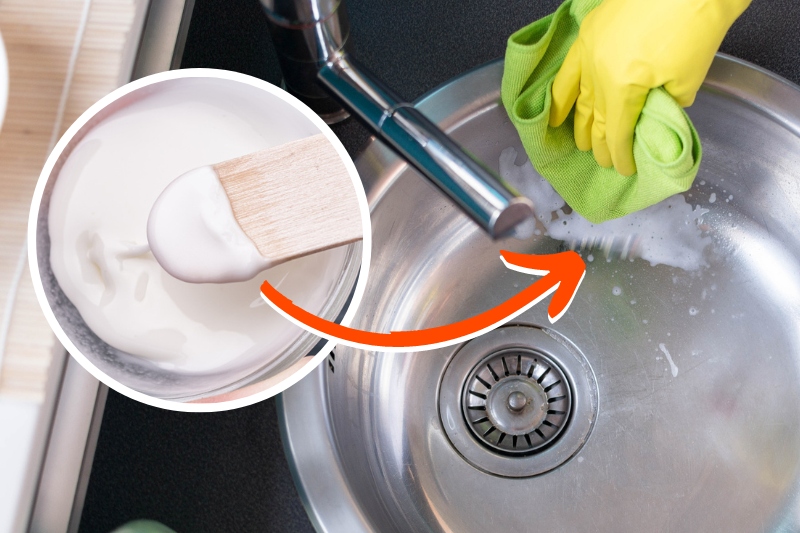
To clean general rust and rust rings off pans, baking trays and garden tools, you can try the bicarb method. (This treatment generally works better on items that aren’t heavily rusted).
In a bowl, create a thick paste made up of bicarbonate of soda and water. Then spread the paste over the whole metal object, paying close attention to the extra rusty spots.
Wait up to an hour for the paste to settle and dry onto the metal surface, then scrub the area using a hard-bristled brush/steel wool. Then rinse the item clean and dry it with a cloth.
Pros: This is a relatively cheap and easy method to carry out, and it uses products that you’ve probably got at home already.
Cons: You’ll need to use some elbow grease to scour the surface clean, which can be tiring. And this method takes at least an hour (but usually longer) to carry out.
Option 3: White vinegar
White vinegar can remove some of the toughest, rustiest patches found on metal, but it does take time to carry out this method. So be patient!
Plus, you’ve got to make sure that the acidity in the vinegar won’t damage or compromise any protective coating your metal may be covered with (patch test first!).
Fill a deep bowl with white vinegar and pop your rusted item into the liquid. Leave the item in the vinegar overnight, and then the following day, scrub the whole surface with a hard-bristled brush.
If you can’t fit your item into a bowl or bucket, don’t worry. Soak a cloth in white vinegar, wrap it around the rusted object and leave it to rest overnight. You can then repeat the scrubbing action mentioned above.
Pros: Easy to use, and minimal elbow grease is required in most cases.
Cons: The entire process takes hours to complete, so it’s not the fastest method to use. In addition, the acid in the white vinegar may damage some coated metal surfaces.
Option 4: Potato and washing-up liquid
A little unconventional, perhaps, but quite a fun and unique option to try out on slightly rusted objects (like kitchenware) is the soapy potato method!
Simply cut a potato in half, cover it with soap (a few blobs of washing-up liquid), and then rub the sudsy spud against the rusted metal surface to remove the blemishes.
This is quite a messy method, so either carry this method out over a sink or cover your workstation with newspaper!
Pros: This is an easy method in principle, and it’s also cheap because you’ve probably got the products at home.
Cons: This is generally a messy method to complete. You’ve also got to be careful when trying out this method as it can make metal objects quite slippery, so it can be a dangerous treatment to carry out on sharp pieces.
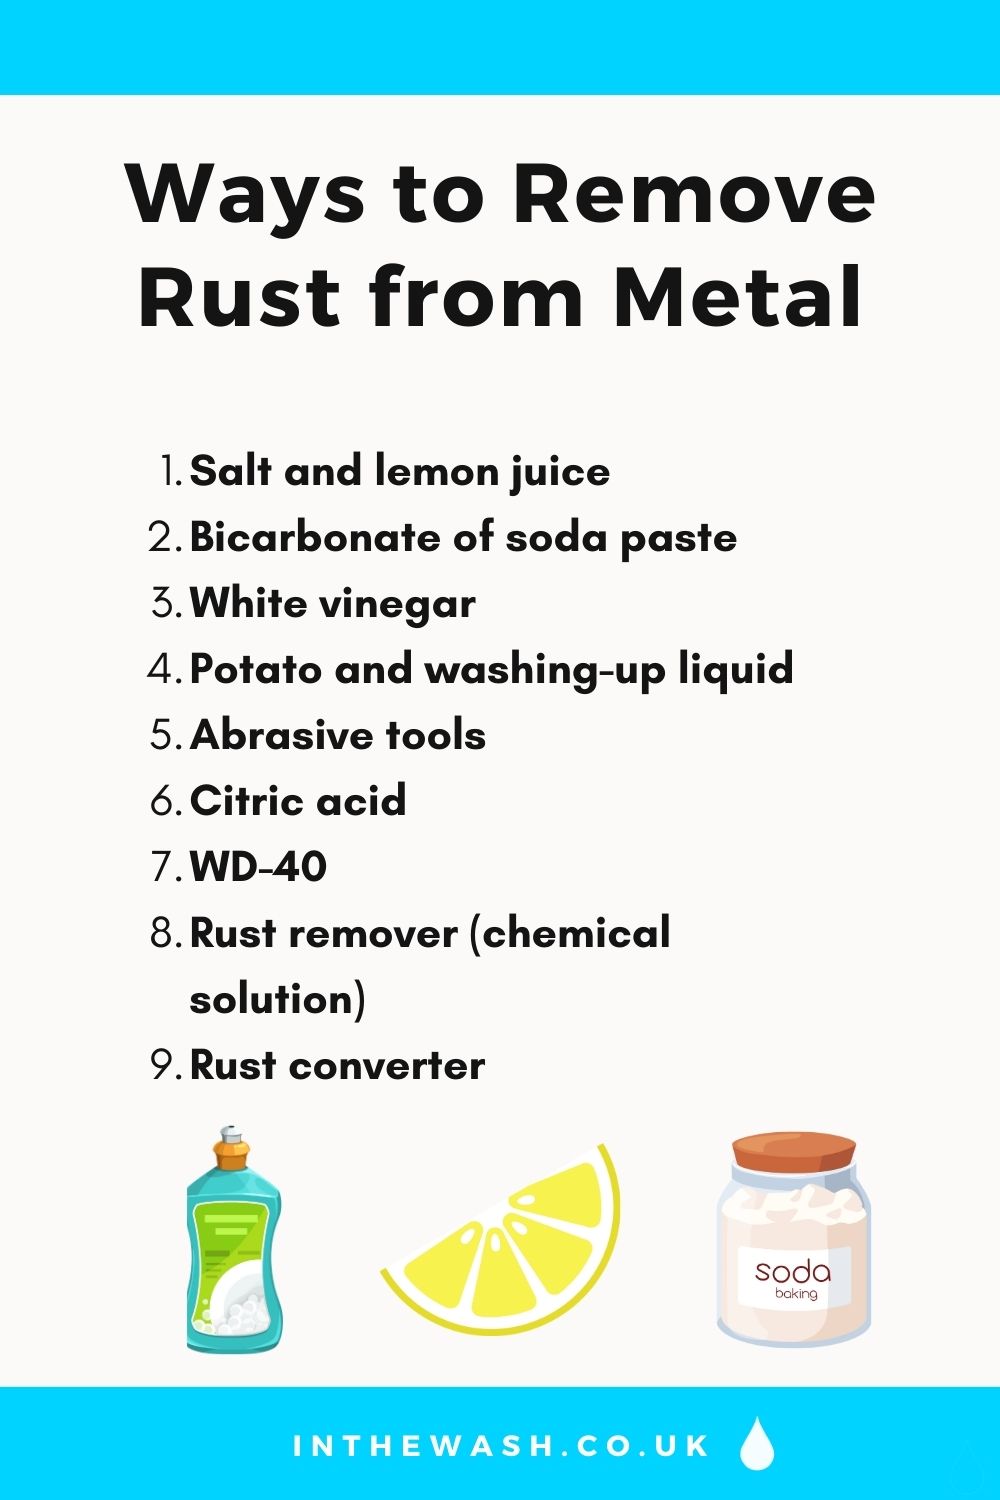
Removing Rust with Specialised Products
Using a homemade cleaning solution isn’t to everyone’s taste, so here are some alternative solutions you can try.
Option 1: Abrasive tools
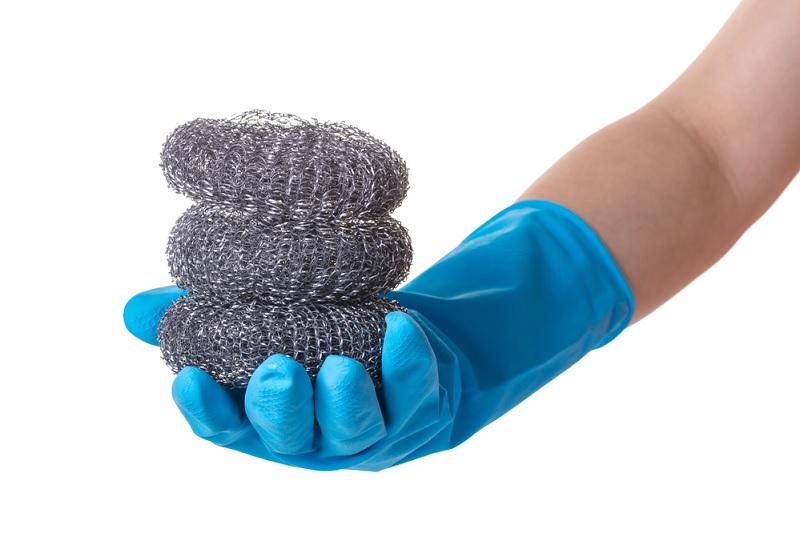
When it comes to removing rust, you don’t always have to use liquids and cleaners. You can use tools to clean rust patches off surfaces!
Abrasive tools like steel wool balls, scourers and electric sanders can all be used to scrape off the rust. And when you’re done scraping, you can sand the whole surface with fine-grain sandpaper to buff out any scratches you made by accident.
Pros: This method is relatively straightforward, and you can use the tools you have at home to do the job.
Cons: There’s a lot of elbow grease involved with this method, and it isn’t always suitable for all types of metal surfaces (when treating cutlery, for example). It can also leave some horrible scratches on metal surfaces. These blemishes then need to be treated, which is essentially extra work for you to carry out.
Option 2: Citric acid
If you’re after a solution that can remove bad rust stains (on tools, for example), you can use citric acid.
However, ensure that the acid doesn’t strip any protective coating from your metal object before you carry out this treatment. You don’t want to compromise your metal item by placing it in a bowl of citric acid.
To try this method, mix two to three tablespoons of citric acid in hot water, and add a rusted item to the bowl.
Leave the rusted piece to rest in the bowl overnight, then the next day, you can rinse and pat the item dry. (You may need to scrub the surface with a brush if there’s extra stubborn rust).
Pros: This method works well and can remove a lot of tricky rust. And most of the time, you don’t have to do anything during the cleaning process (you can essentially leave the citric acid to do all of the hard work for you).
Cons: This process takes time, and in most cases, you’ll likely have to go to buy this item because you probably don’t have it at home.
Option 3: WD-40
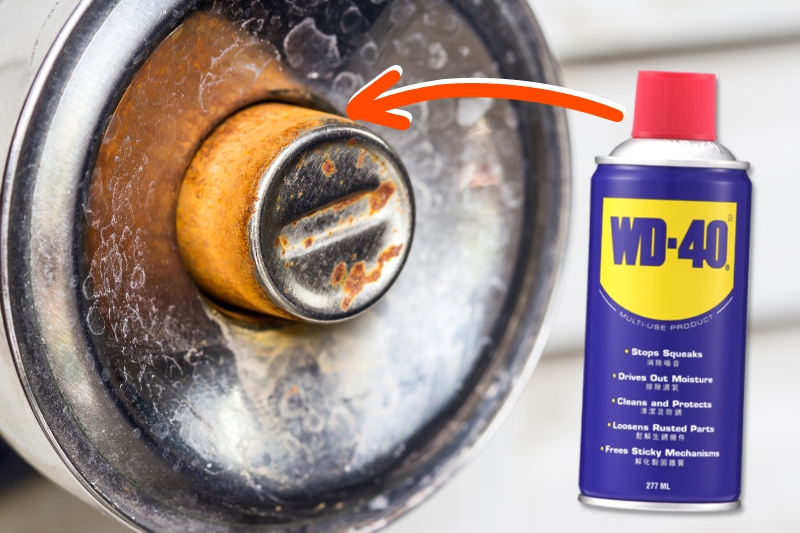
If you’re looking for a simple-to-use treatment, look no further than WD-40. This product will sort your rusty issue out and will even cure any squeaks your item is making in the process!
To try this method, apply a generous amount of WD-40 to the whole rusted area using the wide nozzle on the can.
Wait about ten minutes for the solution to work, then rub the entire surface with a wire brush – pay close attention to extra rusty areas.
When you’re done, grab a clean cloth and wipe the entire surface down so you remove WD-40 residue from it.
Pros: You can utilise a product you’ve got at home, and you’ll get a quick fix to your rusty problem.
Cons: This method may not give you the long-lasting effect that you’d like, so you’ll either have to keep repeating this treatment or find another solution.
Option 4: Rust remover (chemical solution)
A very easy way of removing rust is to use a rust remover that contains phosphoric or oxalic acid that can dissolve rust.
In general, rust removers work pretty well, but they can take a while to work in some scenarios, can be messy, and you don’t always get a lot of solution in a single bottle (may work out costly if you needed to clean a large metal object).
If you’re going to use a rust remover, follow the instructions on the product’s packaging, stick to the stipulated doses, and apply the solution to the metal surface as instructed.
Here are some rust removers you can look into:
- JENOLITE Rust Remover is a thick, non-drip solution that can tear through toughened rust spots with ease to reveal a bare metal surface. It’s a quick-acting formula that can be used on various metal surfaces, including garden furniture, cars and tools.
- Hammerite Rust Remover Gel is a gel-based solution that can clean a wealth of metal surfaces, including BBQs, railings and patio furniture, in as little as two hours. And as this is a gel formula, you can rest assured that the product won’t drip down from vertical surfaces! It’s also super easy to use. You just coat the rusted surface, wait, and then wipe the area clean!
- HG Rust Remover can be used in different ways. You can brush the solution onto large, fixed surfaces (like railings) or dilute it in water and submerge an item in the liquid. This quick-acting formula leaves metals with a rust-free and glowing appearance and protects surfaces from future rusty build-ups.
Option 5: Rust converter
Rust converters can be applied to metal surfaces with a paintbrush or bought in aerosol form.
These converters essentially act like a primer on a rusted surface, and they stop the rust from getting worse. This is the ideal product to cover a rusted metal surface in if you plan on painting the metal (but it may leave the surface feeling rough to the touch).
In general, these products work well at inhibiting the spread of rust, but they might not be able to remove rust from a surface.
Here are some rust converters you can look into:
- Rustins Rust Converter seals and primes a metal surface so that moisture doesn’t give rise to rust. This is a liquid-based treatment that is simple to use. But you will likely have to re-coat your metal in this solution multiple times to protect it effectively.
- Hammerite’s Metal Rust Converter Treatment works similarly to Rustins’ item in the sense that it converts the rust into a more stable condition to prevent future rust development. This item is excellent for treating small rust-ridden areas and oxidised items!
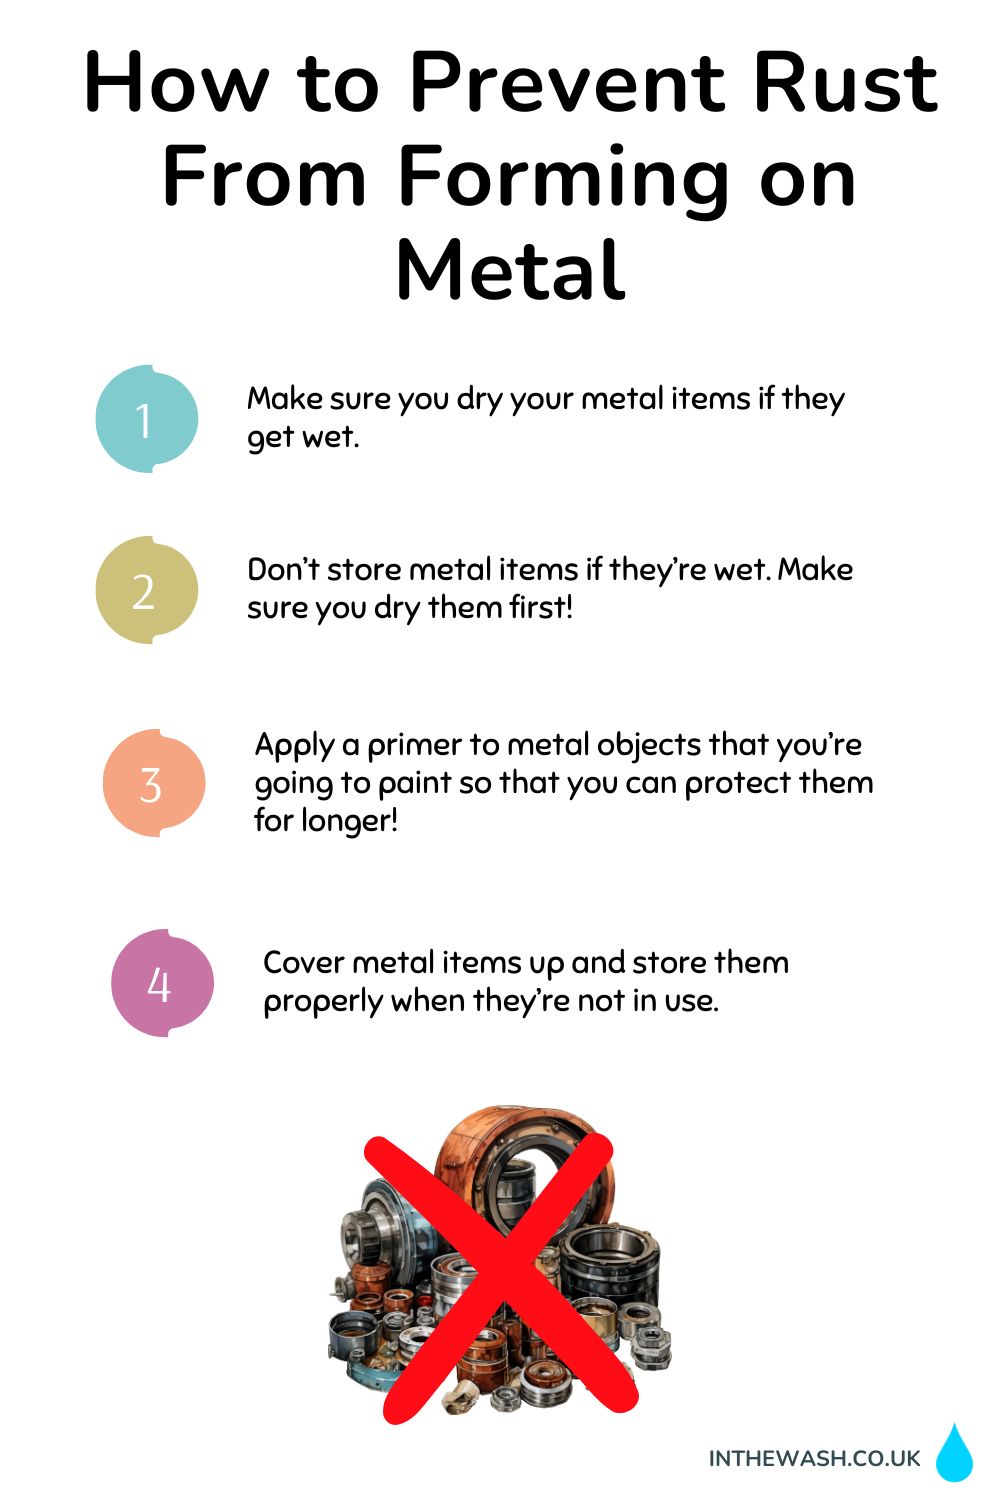
How to Prevent Rust from Forming on Metal
Here are some ideas to help you out:
- Make sure you dry your metal items if they get wet. Otherwise, they’ll oxidise, and you’ll end up with orange patches all over the piece.
- Don’t store metal items if they’re wet. Make sure you dry them first!
- Keep tools and kitchenware in cool, dry places and away from moisture-filled regions.
- Apply a primer to metal objects that you’re going to paint so that you can protect them for longer! And when you paint said object, make sure you use good quality paint and add a sealer to it so that you can protect the surface even more so.
- Cover metal items up and store them properly when they’re not in use. For example, put your tools back in the shed and cover your metal garden furniture up during the rainy months.

Bethan has a passion for exploring, reading, cooking and gardening! When she’s not creating culinary delights for her family, she’s concocting potions to keep her house clean!


