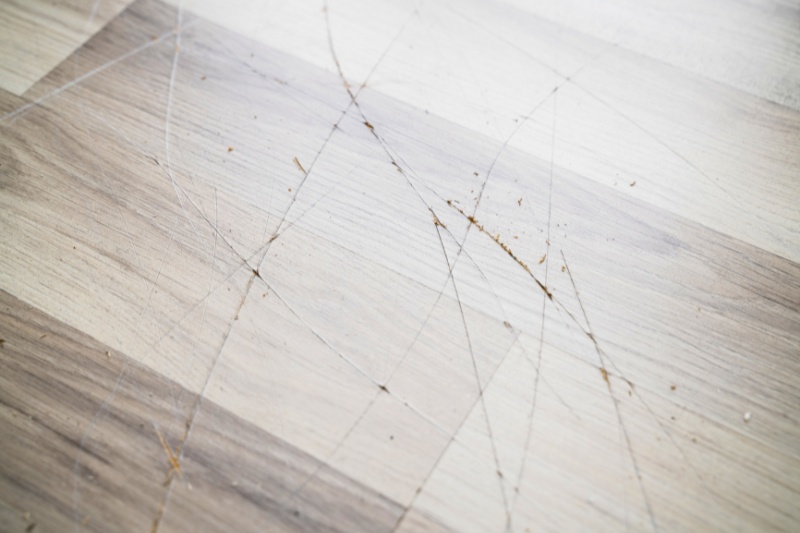
Laminate is durable, easy on the eyes, simple to maintain, and can withstand a lot of foot traffic. But it isn’t completely scratch-resistant.
Tiny blemishes will appear on the surface the more you walk over and use it. And although the small marks are hard to notice and don’t cause too much bother at first, they can turn into more serious issues if they’re not dealt with in time.
So, there’s only one thing for it: you better start removing those scratches from your laminated floors! Find out how you do this below.
Can You Fix Scratched Laminate Flooring?
Yes, you can fix most scratches on a laminated floor. However, how you ‘fix’ the issue depends on how bad the blemishes are.
For example, minor marks can be touched up with a marker. But if you’ve got a bigger problem, you’ll likely have to buy a special repair kit to sort the issue out.
Keep on reading for more details!
Things to Keep in Mind When Treating Scratched Laminate Flooring

- Remove the scratches as fast as you can. Dealing with the scratches early on means they don’t have time to get worse (or at least they get worse at a far slower rate!).
- Test your chosen treatment out before you use it. A simple patch test will tell you if the product you’re about to use will somehow damage or discolour your laminate floor.
- Colour match your product and floor. If you’re going to touch up, use a repair kit or put down a new patch of laminate to cure your scratched floor, ensure that the colour of your chosen product matches the existing colour of your floor. You don’t want to use the wrong hue and end up with a patch that sticks out like a sore thumb!
- Make sure that the laminated surface is clean before treating it. You don’t want debris to damage the surface any more than it may already have done!
- Give your laminate time to dry before walking over it again. Keep kids and pets away from the area. And cover the patch with an empty, upside-down cardboard box so people have to avoid the area!
- Before you fix your laminate, decide what type of scratch you’ve got on the surface. Is it a superficial scratch? Or has someone gouged a chunk of laminate off the floor? Based on your answer, skip to the appropriate treatment listed below.
How to Fix Light Scratches on Laminate Flooring
Light scratches are blemishes that are on the surface level of the laminate. These marks haven’t penetrated deep into the floor and can usually be touched up.
There’s usually not much work involved with carrying out these repairs. You just need to make sure you have the right coloured tools at hand!
Tip: Not sure what colour laminate floor you have? Check the receipt that came with your floor, go back to the shop and ask, or take a spare piece of laminate to a flooring shop and ask them to do a colour match.
1. A touch-up marker
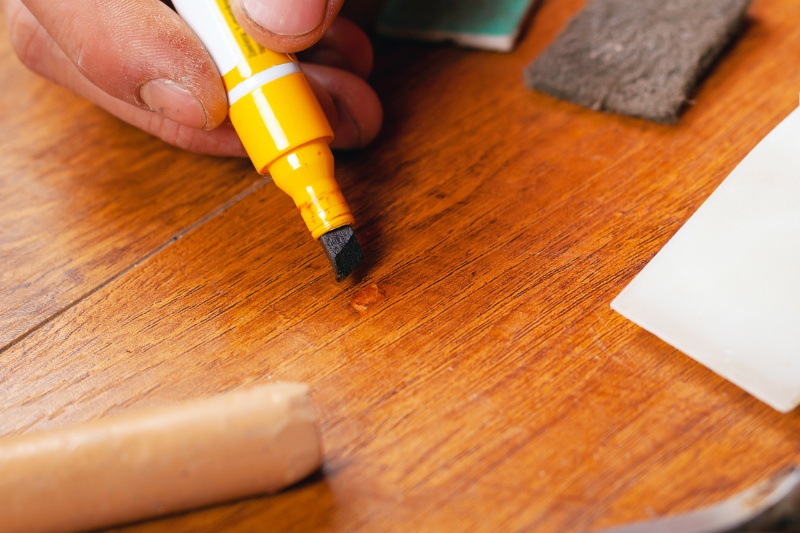
If you’ve got lots of superficial scratches on your laminate, you can remove them by colouring them in.
Nope, that’s not a typo! One of the easiest ways to get rid of minor scratches is to grab a marker pen and trace the scratches with it.
As you move the marker over the scratch, it will change colour and blend into the rest of the floor. It’s as easy as that!
This method isn’t going to work on deep scratches, but it is a very quick and cheap solution to your problem.
Markers can be bought online and in some hardware shops.
Just make sure that you choose a pack that comes with the right colours you need. You don’t want to use markers that are too light or dark for your floor because your repair will look really obvious!
In most cases, markers come in packs of three, so you can blend the markers together to get the right colour if you have to!
Steps to follow:
- Find a marker that matches the colour of your floor. You can find markers online, like this Furniture Repair Kit from DAIXI.
- Once you’ve done this, clean your floor. This will remove any debris from the surface that could cause issues further down the line.
- Grab your marker.
- Carefully move the marker along the scratch in light strokes. Work from one end to the other.
- Don’t press down too hard because you’ll make the ink really dark.
- Repeat Step 4 until your new strokes match the colour of the laminate.
- Optional: You may have to blend the markers together to find the exact colour.
- Optional: Add grain lines to your floor. This will make the repair less obvious.
- Wait a few minutes for the ink to dry.
- Grab a neutral-coloured cloth and buff the repaired patch to make it match the rest of the surface.
Note: In time, the ink will fade, but you can repeat the steps above to repair the scratches again.
2. Crayons
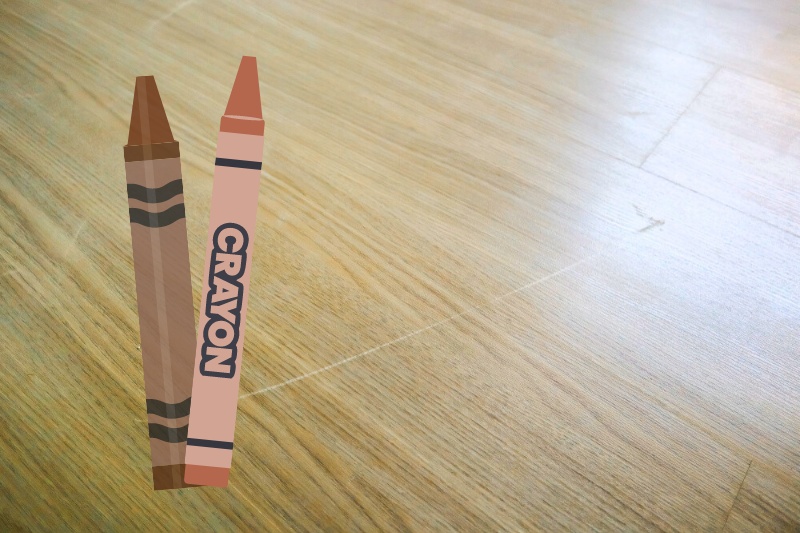
Crayons work like marker pens, and you can follow the steps above to use them correctly!
Like markers, crayons can also be bought in different colours, so make sure you pick a pack with the colours you need!
3. A scratch-removing solution

For light scratches, you can buy solutions that reduce the appearance of scratches on laminated floors, for example Professional Strength’s Laminate Floor & Wood Scratch Remover.
Products like the one mentioned above are generally easy to use. You just rub the formula into a scratched surface with a cloth, and in minutes, the area looks less blemished. It’s a relatively quick and cheap solution to the scratchy issue.
There are, however, mixed reviews when it comes to these types of products. Some users claim they work very well, but others disagree. So, keep this in mind if you plan on using one.
How to Fix Deep Scratches on Laminate Flooring
You’ll need to take a different approach for deeper scratches because the marks will have penetrated the laminate. You’ll therefore have a more significant and noticeable blemish to deal with.
The repairs below are straightforward to carry out, but they will require more time and patience from you. Follow the methods below:
1. Putty/filler repair kit
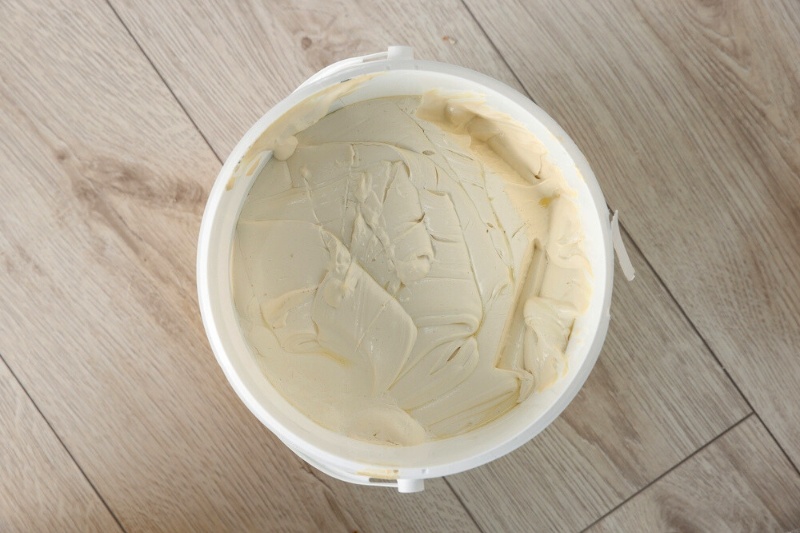
For obvious scratches, a quick way to repair them is to fill the gaps with a putty (filler).
Kits are reasonably priced, come with easy-to-follow instructions, and can usually be used to treat other wooden surfaces, so you’re not limited to laminated floors.
Steps to follow:
- Pick up a putty repair kit that suits the colour of your floor (something like Lifreer’s Laminate Repair Kit). You may have to add a dye to some putty so that it changes to a suitable colour.
- Clean the laminated surface.
- Spread with putty over the scratches with a putty tool (scraper/knife).
- Move the putty tool over the scratches multiple times to ensure the paste is spread evenly and goes into all the gaps.
- Remove the excess putty before it dries with a damp, neutral-coloured towel.
- Wait for the surface to dry.
- Touch up the putty with a marker to make sure the repair blends in with the rest of the floor.
- Buff the floor with a clean cloth.
Note: A putty repair kit may be known as ‘laminate paste’ or ‘laminate filler.’
2. Wax kit
A wax kit is quite similar to the putty kit above. The main difference is that you use wax to fill the scratches instead.
Wax kits can be a little fiddly to use as a beginner. And finding the right balance between how much wax-to-scratch you need to use can be tricky.
To combat this, have a practice go with the kit before you tackle the scratches – you’ll find this quite helpful!
In general, as long as you use the right hues, you’ll get a good, clean finish that isn’t too obvious on the floor after using this type of kit!
Steps to follow:
- Buy a pack of wax filler sticks that are the same colour as your laminate (make sure you buy a pack that comes with an applicator, like this 19 Piece Laminate Floor Repair Kit). Kits can be purchased from flooring stores and online.
- Clean the laminated surface.
- Melt the wax stick using a lighter.
- Allow the wax to melt onto the applicator (a putty knife will also work).
- Use the applicator to pour the wax into the scratches.
- Allow the wax to dry.
- Use a putty knife to remove excess wax from the laminated surface.
- Buff the surface with a neutral-coloured cloth.
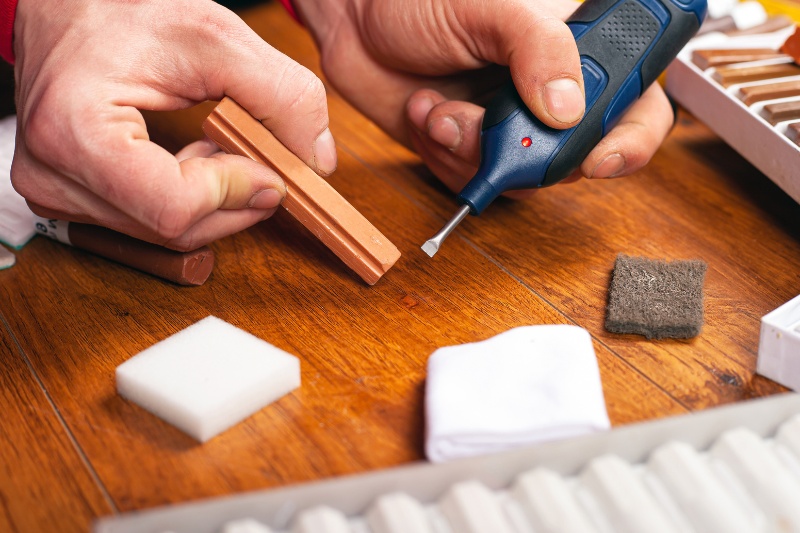
3. Burn-in sticks
Burn-in sticks are the next level up from the wax kits noted above. The significant differences between the two products are that burn-in sticks are usually made from resins and are more costly.
Like other repair kits mentioned, you can pick up burn-in sticks from shops that sell floors and online retailers.
It’s sometimes better if you buy the gear from the shop you got your laminate from so you can (hopefully!) get a colour match.
When used correctly, they’re arguably the best type of repair kit when dealing with deep and obvious scratches on laminated surfaces.
They give a smooth and sleek finish, and blemishes in the material are not easily spotted after using said kit!
Steps to follow:
- Read the instructions on how to use the kit and familiarise yourself with the kit’s contents (the sticks and electric knife).
- Clean the laminated surface.
- Fire up the electric knife.
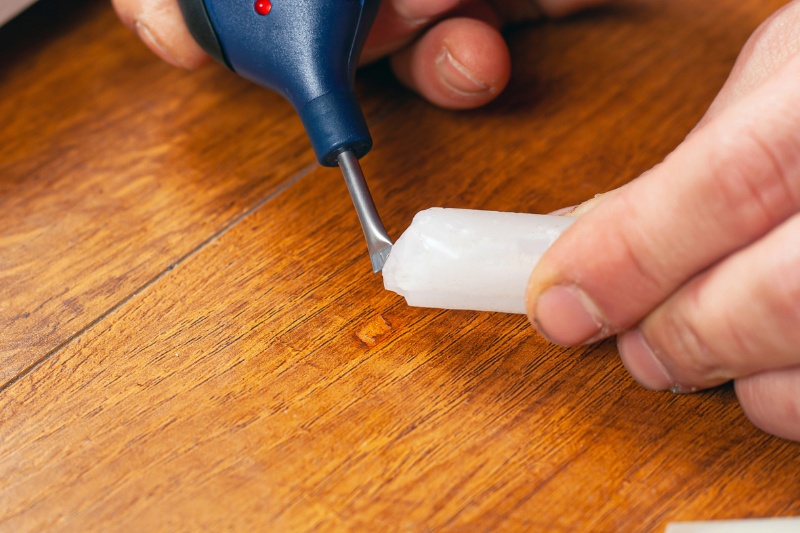
- Melt the burn-in stick onto the knife.
- Fill the scratch with the liquified burn-in stick.
- Use a putty knife to remove excess product from the surface.
- Wait for the floor to dry. The instruction manual will tell you how long you need to wait.
- Buff the surface.
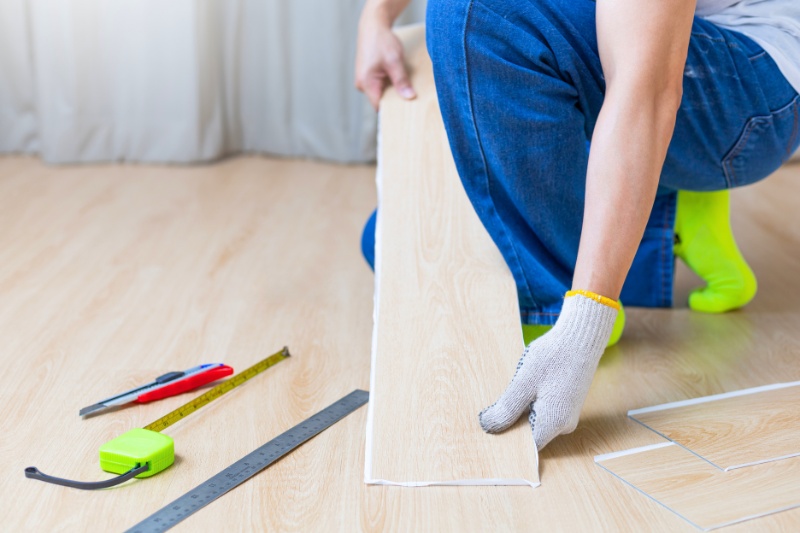
4. Patch repair
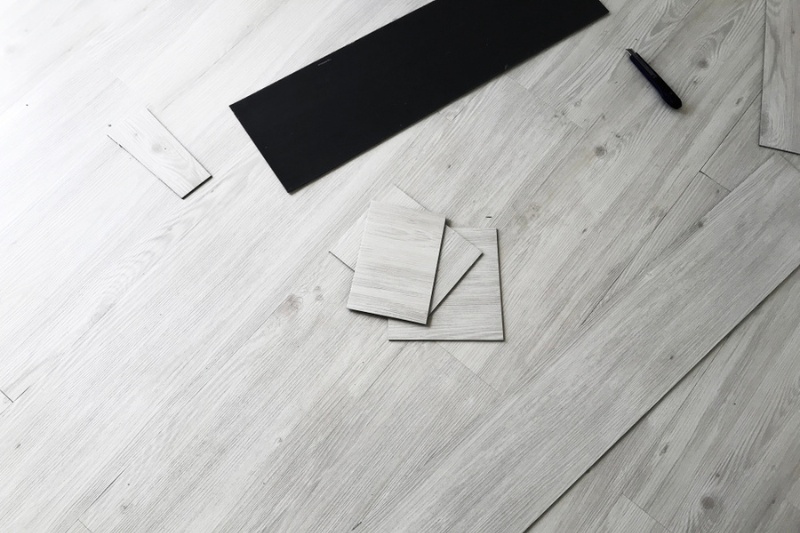
If there’s substantial damage to a particular area, replacing the laminate planks in that region may be easier!
You can replace the laminate yourself or call a professional floor fitter to help you.
The main concern with this type of repair is that you may not be able to find an exact match for your laminate floor. This is particularly true if the floor has been down for years.
However, you can talk to a shop assistant in a flooring store about this, and perhaps they can source the planks you need or give you a close match.
5. Ask a pro
If you have very deep scratches on your floor that are beyond a simple repair job, it may be better to turn to a professional floor fitter for advice.
A pro will likely come out to assess your laminate and advise you on the best course of action.
Perhaps they’ll be able to salvage your laminate and do several repairs. The pro will, after all, have access to different tools and products to you.
However, they may advise you to replace the whole floor if the damages are severe.
Of course, the laminate would have to be in pretty poor condition for this to be the case. Nonetheless, it’s something you should be aware of.
What Causes Scratches on Laminate Flooring?
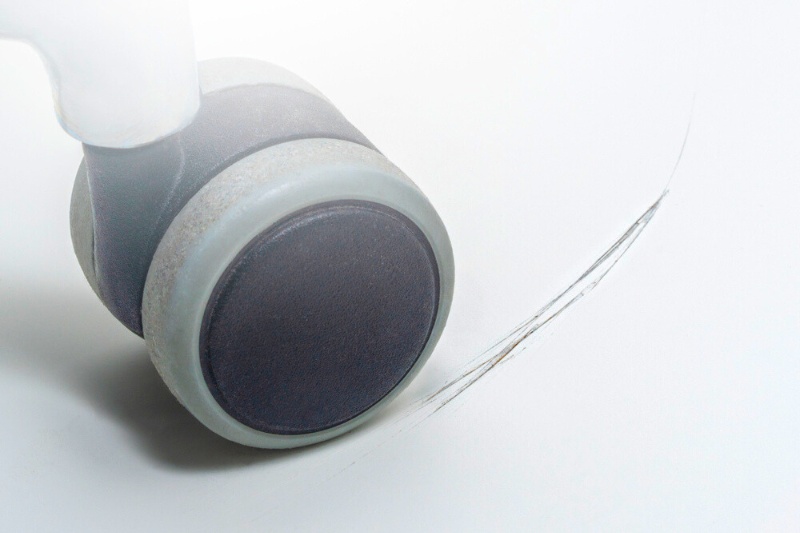
Laminate floors are hardwearing, but they’re not 100% scratch-resistant. Here are a few reasons why your laminate is getting scratched:
- You’re moving furniture around, and in the process, you’re scraping the floor.
- You’ve dropped something heavy onto the laminate.
- You allow your kids to rub toys along the floor, and they’re scratching it.
- You and other family members are bringing grit into the house via your shoes.
- You haven’t put any anti-scratch pads on your furniture.
- Your pet’s nails are sharp, and as they walk/run over the surface, they leave tiny scratches behind.
- The shoes you wear impact the floor – stilettos, for example!
- All of the above could be causing scratches – it’s just general wear and tear!
Ways to Prevent Scratches in the Future
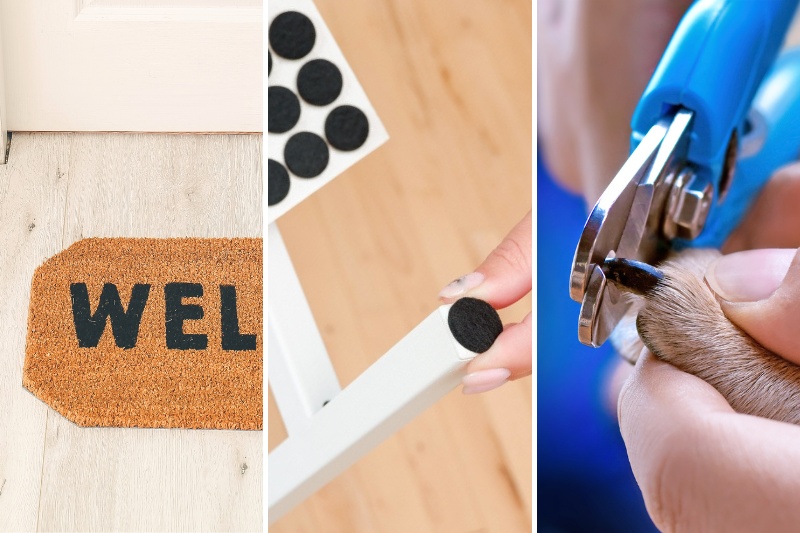
Now you know what might be causing the scratches, here are some ways you can reduce them:
- Use mats wherever possible to protect the surface. This is particularly true for playrooms and high-traffic areas.
- Put anti-scratch pads on furniture so they don’t mark the surface.
- Lift and move furniture; don’t drag it around on the floor.
- Wipe your shoes on a mat before you enter the house – that’ll remove grit and other debris from the soles.
- Have a no-shoes policy indoors.
- Regularly maintain your floor and keep it clean. Regularly brush and repair the surface if there’s something wrong with it (don’t allow scratches and warping to deteriorate).
- Trim your pet’s nails.
Top tip: Keep a repair kit at hand if your laminate surfaces are prone to getting scratched. The Lifreer Laminate Floor Repair Kit is a massive 40-piece kit that comes with a range of tools to make your repair jobs easier. This includes markers, crayons, fillers, a putty knife, and brushes. With this kit in tow, you can repair scratches as soon as they appear.

Bethan has a passion for exploring, reading, cooking and gardening! When she’s not creating culinary delights for her family, she’s concocting potions to keep her house clean!
