If your washing machine is filling with water when it’s turned off, there could be several potential reasons for this issue.
Here are five common causes:
Reason 1: Faulty Water Inlet Valve
The first and most common reason why your washing machine is filling with water is due to issues with the water inlet valve.
As the name suggests, the water inlet valve is the component responsible for controlling the flow of water into the washing machine.
If this valve is faulty or damaged, it may not close properly, allowing water to continue filling the machine—even when your washer is turned off.
The water valve can malfunction for several reasons. Sediment build-up might be responsible, especially if you live in a hard water area.
Hard water is bad for your washing machine, as the minerals naturally found in the water can accumulate inside the valve and prevent it from closing.
A damaged valve seal can also cause water to leak into the drum, as can faulty electrics.
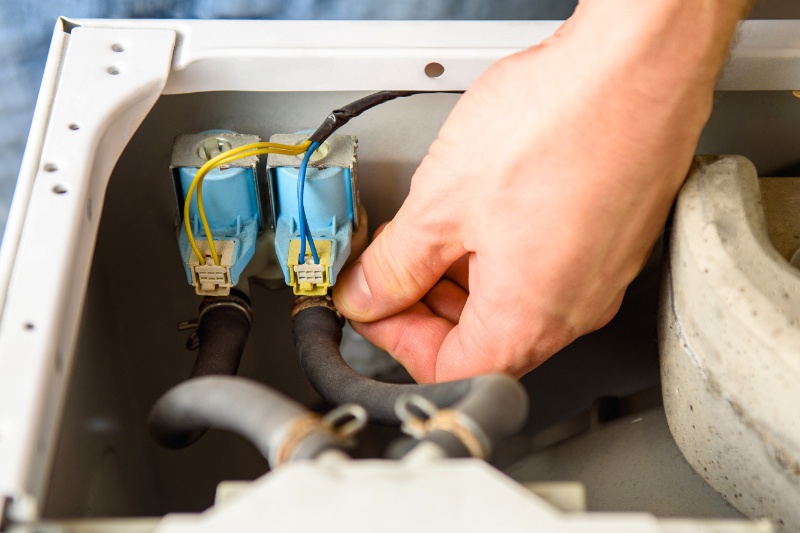
To check if the water inlet valve on your washing machine is broken or faulty, follow these steps:
- Turn off the power and water supply: For safety, ensure that your washing machine is unplugged from the electrical outlet before inspecting the water inlet valve. It’s also a good idea to shut off the water supply to your washer.
- Locate the water inlet valve: Although all washing machines are different, the water inlet valve is typically located at the back of the appliance where the water hoses connect. It is usually a rectangular or square-shaped unit with electrical and water connections.
- Inspect for visible damage: Check the water inlet valve for any visible signs of damage, such as cracks, breaks, leaks, or sediment build-up. If you notice any visible damage, the valve likely needs to be replaced or thoroughly cleaned.
- Check electrical connections: Ensure the electrical connections to the water inlet valve are secure and not loose or corroded. Loose or damaged electrical connections can prevent the valve from functioning correctly.
Reason 2: Broken Water Level Sensor
In a washing machine, water levels are monitored by a pressure switch. This switch signals the water inlet valve to shut off when the desired level is reached.
If the pressure switch is stuck or defective, it may not signal to stop water flow, leading to the machine filling with water even when turned off.
Several things can cause the water level sensor to malfunction. If you have an old washing machine, the pressure switch may have become worn out over repeated use.
Alternatively, the build-up of dirt, debris, and lint from your clothes and sheets may have accumulated, which can impact the accuracy of the sensor readings.
Here’s a step-by-step guide on how you can check the water level sensor in your washer:
-
- Access the pressure switch: The pressure switch is typically located behind the control panel of the washing machine. To access it, you may need to remove the control panel or the top of the washing machine, depending on the make and model.
- Locate the pressure switch: Look for the pressure switch. It is usually a round or rectangular device with electrical connections and a small plastic or rubber tube connected to it. If you cannot find it, consult the manufacturer’s instruction manual.
- Check for obstructions: Inspect the tube connected to the pressure switch for any obstructions. An easy way to do this is to disconnect the tube from the pressure switch and blow into it. You should be able to feel the pressure change as you release air into the tube.
- Test the pressure switch: If the tube appears in good condition, test the pressure switch using a multimeter to measure continuity while manually adding or removing water. As water levels change, the switch should move from open to closed (or vice versa).
Reason 3: Leak in the Internal Plumbing
Internal leaks in your washing machine could also be causing it to fill with water when not in use.
For example, issues with the water hoses can lead to leaks and continuous water flow.
Likewise, broken pumps might be to blame—the pump is responsible for draining water from the machine drum, so malfunctioning pumps can result in a backflow of water.
Because internal plumbing problems encompass many issues, contacting a plumber to review and fix any malfunctioning parts is advisable.
If you do want to try and inspect your washer for leaks yourself, here are a few things you can try:
- Inspect the water hoses: Water hoses are typically located at the back of the washing machine and connect to the water inlet valves. There are two hoses – one for hot water and one for cold water. Check the entire length of each hose for any visible signs of damage.
- Straighten kinks in the hoses: If you cannot see any signs of damage (cracks, bulges, fraying, etc.) in the hoses, check for kinks. Ensure that the hoses are not kinked or bent in a way that restricts water flow, straightening out any kinks that you discover.
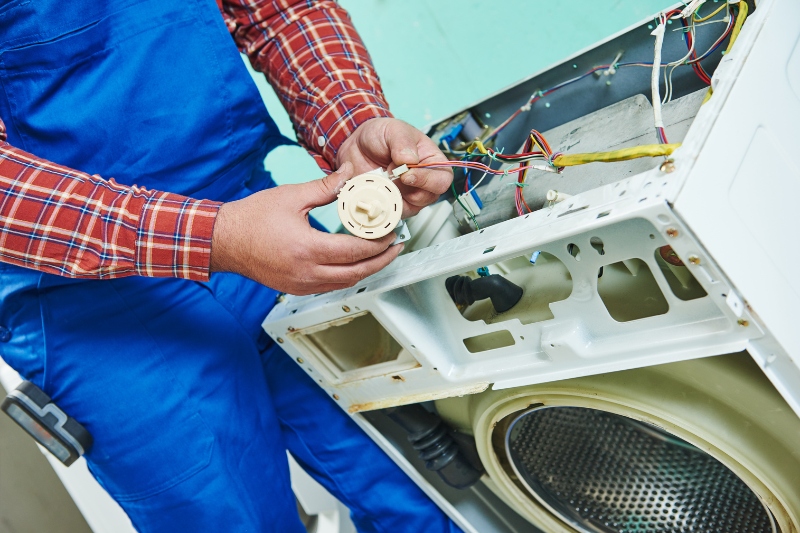
- Inspect the pump: The pump is usually located at the bottom of the washing machine, often accessible by removing a panel or cover. Once you’ve found it, check to see if the washer pump is bad by looking for general signs of wear, blockages, and disconnected hoses.
- Test pump functionality: If you suspect the pump may be faulty, perform a test using a multimeter. Disconnect the electrical connections and set the multimeter to measure continuity. Test the terminals on the pump—if there’s no continuity, the pump may be faulty.
- Run a short cycle: Run a short cycle to observe the pump and hoses for any signs of water leakage. Also, keep an eye on other areas of the machine. Although pump and hose issues are most common, water may be escaping due to problems with another internal component.
Reason 4: Malfunctioning Control Board
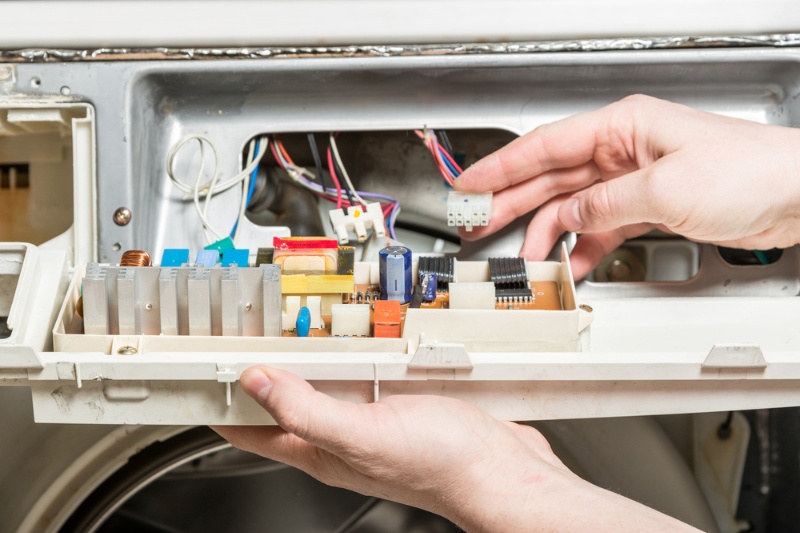
Occasionally, there can be a malfunction in the programming or control board of the washing machine.
This can cause incorrect signals to be sent to the water inlet valve, resulting in water filling the drum when it should be off.
A professional technician may need to diagnose and fix this issue—checking the control board of a washing machine involves inspecting for visible signs of damage, testing for electrical continuity, and ensuring proper connections.
However, if you want to solve the issue yourself, here’s a step-by-step guide to help you check the control board:
- Safety precautions: Turn off the power to the washing machine and unplug it from the electrical outlet. Take other appropriate electrical safety measures to avoid electric shocks while working with electronic components.
- Locate the control board: The control board is usually located inside the control panel of the washing machine. You may need to remove the control panel or access the back of the machine to reach the control board.
- Inspect for visible damage: Carefully examine the control board for any visible signs of damage, such as burnt or melted components, dark spots, loose connections, or corrosion. Check for loose or disconnected wires, connectors, or solder joints.
- Check the fuse: Some washing machines have fuses on the control board. Test the fuse using a multimeter to ensure it’s not blown. You should also look for any components on the control board that appear burnt, fused, or deformed.
- Test for electrical continuity: Set a multimeter to measure continuity or resistance and test various electrical connections and components on the control board. Refer to the washer instruction manual to compare your readings against the expected measurements.
- Power on test: Reconnect the washing machine to power and observe the behaviour of the control board when the machine is powered on. Check if any error codes are displayed or if the control board responds to commands.
Reason 5: Backfilling with Dirty Water
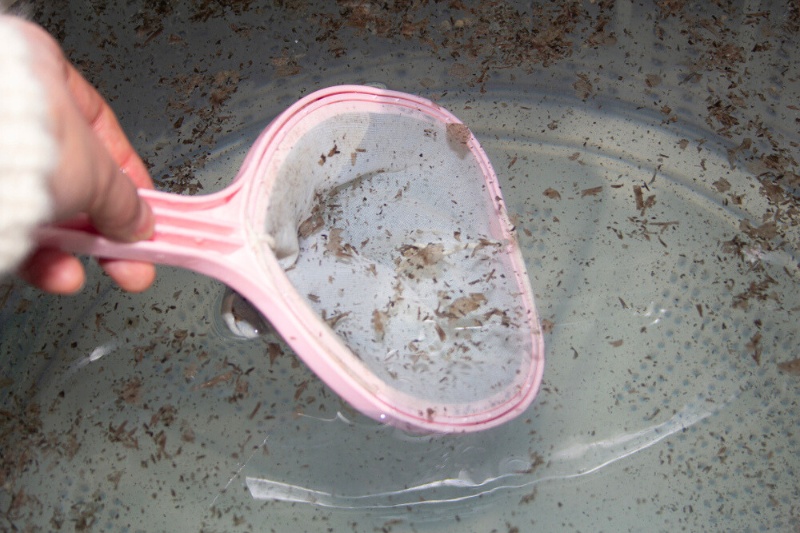
If there’s a backflow issue in your plumbing system, water could be flowing back into the washing machine even when it’s turned off.
You’ll know if this is the issue you’re dealing with by looking at the dirtiness of the water. If the water is clean, you have a forward-flowing issue, but dirty water signifies a backfilling problem.
A backflow of water is typically caused by issues with the drain hose, preventing the washing machine from draining properly.
To check if this is the issue with your appliance, follow these steps:
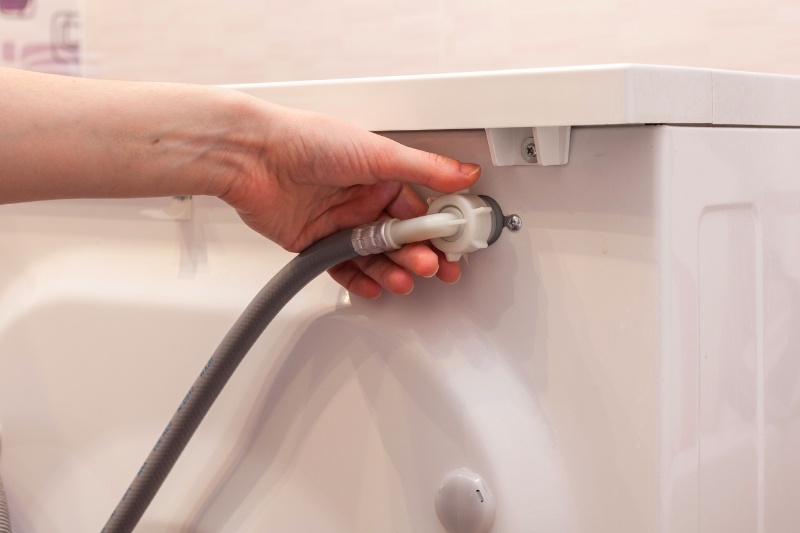
- Check for blockages: Locate the drain hose on the back of the washer, typically next to the hot and cold water supply hoses. Check the drain hose for any obstructions or kinks that could impede the flow of dirty water out of the washing machine.
- Assess for damage: There is a chance your drain hose might be split, which often occurs when moving the washing machine or from long-term appliance usage. Check for damage and replace with a standard-size drain hose if needed.
- Check drain hose height: The drain hose must be elevated to do its job properly. Ensure that the drain hose is installed at the correct height and angle. The drain hose should be positioned at a height that allows water to flow out freely without backflow.
- Check standpipe issues: If the drain hose is inserted too far into the standpipe, it can create a siphoning effect, causing dirty water to backflow into the washing machine. You should also inspect the standpipe for any blockages or restrictions that might prevent proper drainage.
Conclusion
If your washing machine keeps filling with water when it’s turned off, you need to fix the underlying issue. This is crucial in preventing potential flooding and damage to your washer and your home.
Use the steps above to help identify which issue you’re dealing with and fix it accordingly.
To summarise, ensure you check the water inlet valves, pressure switch, water hoses, washing machine pump, and drain hoses.
Whichever component you find responsible for the malfunction must either be cleaned (if blocked with debris) or replaced (if damaged and irreparable).
If you’ve attempted these troubleshooting steps and the issue persists – or if you’re uncomfortable with the diagnosis and repair – it’s advisable to seek help from a professional appliance repair technician.
If they have no luck, it might be time to buy a new washing machine. For help choosing a top-rated appliance, see our guide to the best washing machines.

Hannah has a passion for cleaning. She worked her way around Australia by cleaning hostels in exchange for free accommodation and used her cleaning skills to bag a job as a chalet host for a luxury ski company in France.
")


