Can you smell hot dust when you put the heating on? Sounds like it’s time to clean your radiators! But if you’ve got top grills on yours, you may wonder how best to tackle this dusting job.
Failure to clean your radiator makes it less effective at heating your home and could even shorten its lifespan. However, knowing how to clean it in the right way will ensure your house stays nice and cosy without any strange burning smells.
Having a clean radiator could even save you money on your heating bills, as you might not need to have it on the highest setting all of the time.
Things You’ll Need
Here we’ve pieced together some really useful tips on how to clean radiators with a top grill. Let’s start with some of the items you may want to have on hand for tackling this task:
- Handheld vacuum
- Feather duster
- Hairdryer
- Dust cloth/towel
- Sturdy stick
- Elastic bands
- Radiator brush
How to Clean a Radiator with a Top Grill
Step 1: Switch off the heat
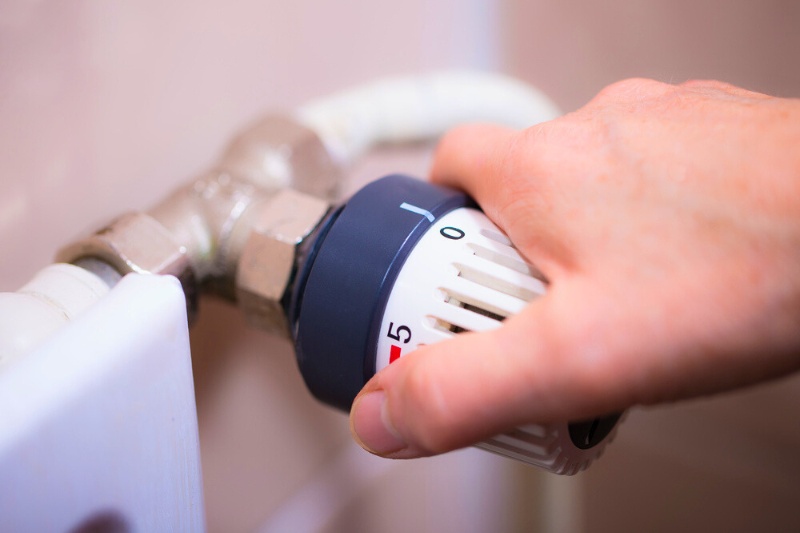
You really don’t want to be cleaning a radiator while it is hot, so turn the temperature valve down to the lowest setting and make sure your heating is off before you start doing anything.
For ensured safety, give the radiator some time to cool fully before you touch it or start the cleaning process.
Step 2: Remove the grill
On most radiators, it’s the side panels which hold the top grill in place, therefore, the first step in removing top grills is by unclipping the side panels. Follow this simple procedure:
- Hold the side panel at the top and bottom and apply a little bit of force in an upwards motion to lift off the sides.
- Check whether you need to unclip the grill if your radiator has only one side panel.
- Lift the unsupported grill with both hands.
This handy video we found on YouTube should help you to get the grill off the top of your radiator easily:
Step 3: Remove the dust
Option 1: Vacuum cleaner and feather duster
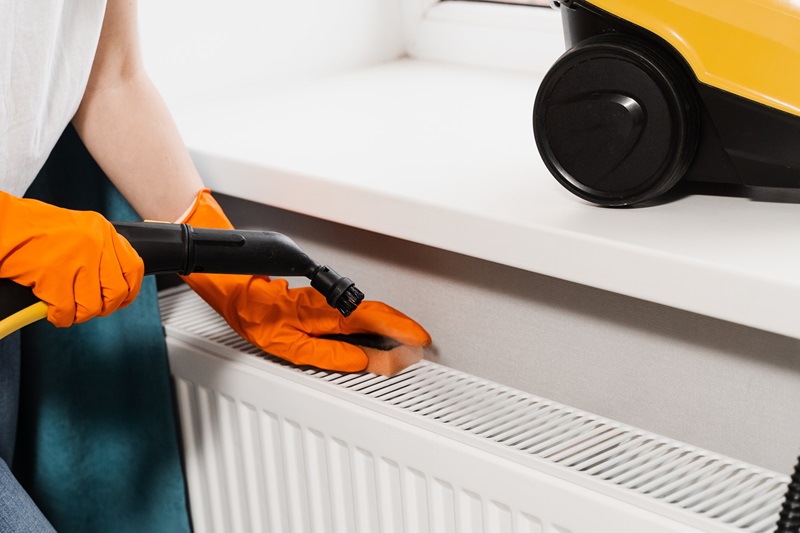
Once the grate is off the top of your radiator, you can grab your feather duster and get to work cleaning away any fluff that you can see on top of or inside the fins.
Feather dusters can leave a lot of loose dust flying around, so a handheld vacuum would be great as a complementary tool for this cleaning job.
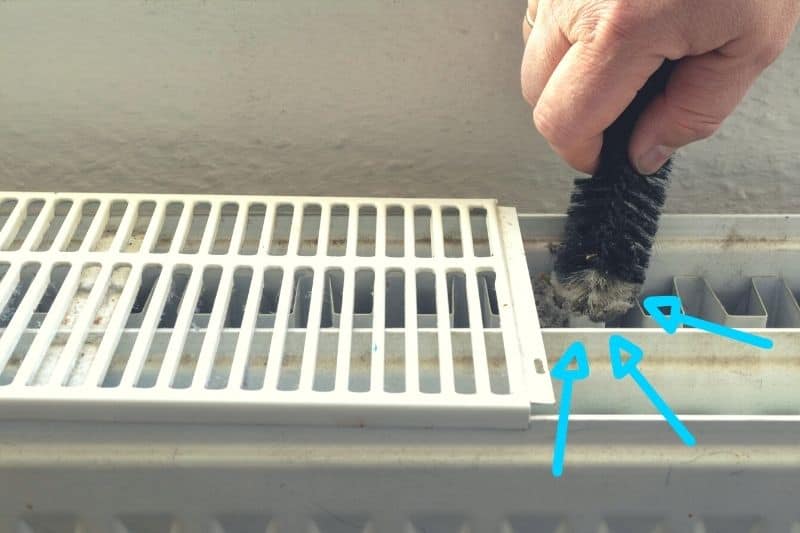
Option 2: radiator brush
There are some really handy tools which have been designed specifically to clean the difficult to reach parts of radiators – these long microfibre brushes are ideal for removing dust from deep down inside a radiator.
These are perhaps the most practical way to clean inside and down the back of a radiator due to their length and all of those dust-catching bristles, so it is well worth investing in one.
If your cleaning supplies budget is a little on the tighter side, you can hack your way to a clean radiator.
All you need is a stick that fits inside or down the back of your radiator and is strong enough to resist breaking as you push it through the radiator fins and some microfibre or plain dusting cloths (or even old cotton socks)! Use elastic bands to hold the cloths in place around the stick and there you have it.
Only use clean, soft cloths for this task as you don’t want to be smearing anything inside your radiator or scratching it and be extremely careful when using a stick which may not have any bend or give in it.
Push this cloth-covered stick through the fins back and forth to remove any trapped dust. Change the cloth intermittently as you work or remove the dust from the cloth, otherwise, you’ll just be depositing it back into a different fin… which isn’t ideal. As with our first method, it may be a good idea to have your vacuum cleaner at hand.
Option 3: Hairdryer
This technique may not be the most practical, but it will definitely help to remove loose clumps of fluff and dust – use your hairdryer to blow the dust out of your radiator.
Angle your hairdryer downward into the top of the radiator and blow dust out of the bottom of the fins. Of course, this will only work if your radiator is open at the base, or you’ll end up with even harder-to-reach dust.
QUICK TIP: If your hairdryer has a cool setting, use this to stop your hairdryer overheating or fusing.
A minute or two of blowing air along the top of your radiator, back and forth, will help to remove dust and fluff from inside and just leave you with a little bit of vacuuming to do of the floor below.
The good thing with a hairdryer is that you can use it from time to time to help to reduce the build-up of dust, meaning a deep clean may not be needed. This is quite a handy tip for anyone with particularly fluffy pets in the house!
Step 4: Clean the outside and the grill
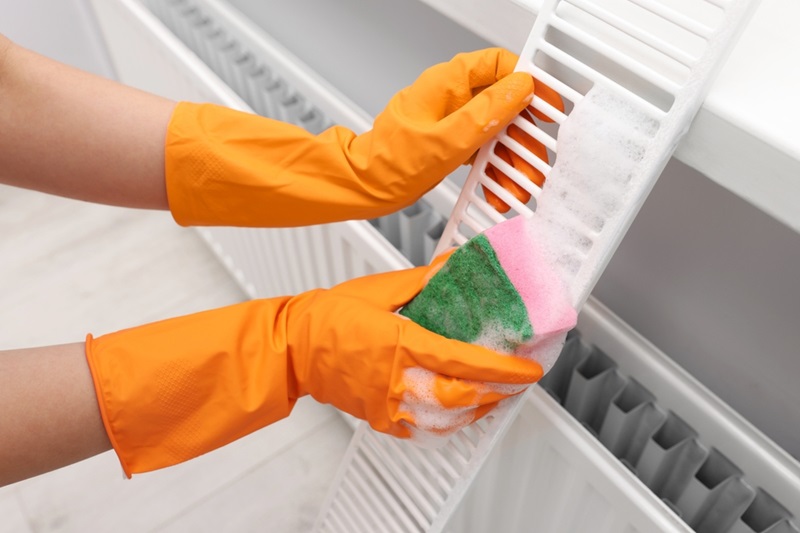
Use a feather duster or cloth to give the front of your radiator a once-over before applying any water – there’s nothing worse than wet dust that just gets stuck on and moved around.
Once the front is dust-free, use a soft cloth or sponge with a small amount of mild soapy water to clean the outside of your radiator. Do not use a dripping wet sponge and avoid getting any moisture on the inside of the radiator.
Use the damp sponge to wipe the external parts of your radiator, applying a bit of elbow grease for any sticky bits. Clean the side panels and grill while they are separate from the radiator and let them dry fully before replacing them.
Step 5: Replace the grill and panels
Once you’re happy with your newly dust-free radiator, its time to pop the grill back in place and put the sides back on, ensuring each panel goes back in its original place. Make sure everything that needs to be clipped or clicked into place is secure before putting your heating on.
If the side panels won’t come off, it may be best to get a tradesperson to assess whether or not you can dismantle your radiator for cleaning or not.

In The Wash is your guide to the best laundry and cleaning products, tips and tricks. Our mission is to solve the UK’s cleaning and laundry dilemmas!


