While a lot of people choose to have their homes carpeted, laminated or covered in vinyl, other individuals like to have floorboards as their flooring.
And why not! Floorboards are incredibly attractive if they’re regularly maintained and well kept. Plus, they’re easy to keep clean – particularly if you’ve got several pairs of paws running around the house.
While some of you may think that floorboards can be quite cold and off-putting, I happen to think that they not only add a touch of class to a room, but they add a quirky character to any space in a house.
But the burning question is, how do you keep floorboards looking so sleek and effortlessly clean? Keep on reading to find out how to clean floorboards.
Determine If Your Floorboards Are Finished or Unfinished
One of the very first steps you should take before you decide to clean your floorboards is to check if they are finished or unfinished.
What’s the difference between the two?
Finished floorboards have been treated and stained before being set down in your house. This procedure was typically done in a factory before the floorboards got to your home.
Unfinished floorboards, on the other hand, are laid in their raw form—no protective layer has been added to them. Typically, unfinished floorboards are treated after they have been set down but not always.
Untreated floorboards will eventually end up scuffed, ruined, moisture may get trapped in the wood and the natural colour of the wood will not shine through. Although, these issues can affect finished floorboards too, if you’re not careful.
How to tell the difference between finished and unfinished floorboards
Use these tricks to check what type of floorboard you have underfoot:
- Finished floorboards have a richer colour
- Smooth floorboards are more likely to be finished
- Drop a bead or two of water onto the floorboard – if the beads bunch together you’ve got finished floorboards, if the water soaks into the floorboards you’ve got unfinished flooring.
So, now you can tell the difference between unfinished and finished flooring, how do you actually clean the floorboards you have? Read on to find out.
Cleaning Your Floorboards: Dos and Don’ts
Just before you read on, you should definitely check out this list of ‘dos’ and ‘don’ts’ when cleaning floorboards:
Dos
- Act quickly – If you need to mop up liquids from the floorboards you must act quickly, and you must remember to remove the liquid from the mop before continuing to clean up the mess. Additionally, you could keep swapping mop heads, if possible, when you’re clearing up a whole lot of water.
- Sweep or vacuum regularly – Maintaining your floorboards on a weekly basis, at least, will do the world of good. Just gently sweep or hoover the floor.
- Be careful with products – If you do decide to use a wooden floor cleaner on your treated floorboards, you must make sure that you choose a suitable product for the job. You must also follow the directions on the packaging, so you don’t use too much product in one go – this could be a disaster in itself.
- Clean small sections where needed – If you need to do some basic cleaning in one area of a room, do so. Small section cleaning will help to keep your floorboards in tip-top condition. Don’t let silly debris get you down.
- Use mild products where possible – It’s not essential to pick up products that contain harsh chemicals to clean your floorboards, so wherever possible, pick products that are family friendly and natural.
- Clean during warm weather – Try and clean your floorboards when the weather is nice outside, warm weather will help your flooring to dry off quicker. Plus, if it’s dry outside you don’t have the risk of someone walking onto your freshly cleaned floor with muddy and wet boots!
Don’ts
- Use too much water – You should never clean untreated floorboards with a mop and a whole load of water!
Why?
If you dump a bucketful of water, and it doesn’t make much of a difference if it’s cold or warm, onto untreated floorboards the water will cause the wood to warp and break eventually. Replacing water damaged floorboards is not an easy job and it’s not that cheap either. So, avoid damaging them with excess water. - Use tough cleaning tools – You should never use tough cleaning tools to treat any kind of wooden floorboard. This means that scourers, hard brushes and anything that’s likely to cause scratches are off limits.
Why?
Scrubbing wooden flooring of any kind will mark it, and these marks will be quite difficult to remove once they’re ingrained in the material. While the odd scuff here and there is obviously going to happen, you really don’t want to cause major damage to your flooring by rubbing so hard on the floor with the wrong equipment! - Use any old wooden floor cleaner – It may be tempting to pick up a wooden floor cleaner at the supermarket to clean your floorboards, but you need to stop what you’re doing and read the packaging.
Why?
While it may be easy to assume that all wooden floor cleaners are suitable for all wooden floors, you’d actually be very wrong! In fact, if you use a wooden floor cleaner on floorboards that have not been treated in any sort of way, you’ll probably stain and mark them. Trying to remove such blemishes will be hard and tiring work – so don’t go there! - Don’t sand too much – If you need to remove heavy duty scratches from your floorboards while cleaning, remember not to go over-the-top with the sanding.
Why?
Oversanding floorboards makes them go ever so slightly warped and they can start to look out of place. Not to mention the fact they can become uneven too. If you plan on hand sanding, just sand the floorboard gently and slowly.
I would not recommend using an electric sander because you may get too ‘handy-sandy’. But, if you know how to use an electric sander correctly, then sand away at your own risk.
Cleaning Finished Floorboards
- Arrange your furniture, so you don’t have to keep moving them around.
- Decide which way you will clean your floor so you don’t end up boxing yourself into a corner. (Start at the furthest coroner and work your way towards the exit door).
- Pop some socks on your feet so you won’t get footprints on your floor, but be careful not to slip.
- Brush the floor to remove any excess dirt.
- Hoover the floor to get rid of any debris that you couldn’t remove by sweeping. (Switch the hoover onto the hard floor setting)
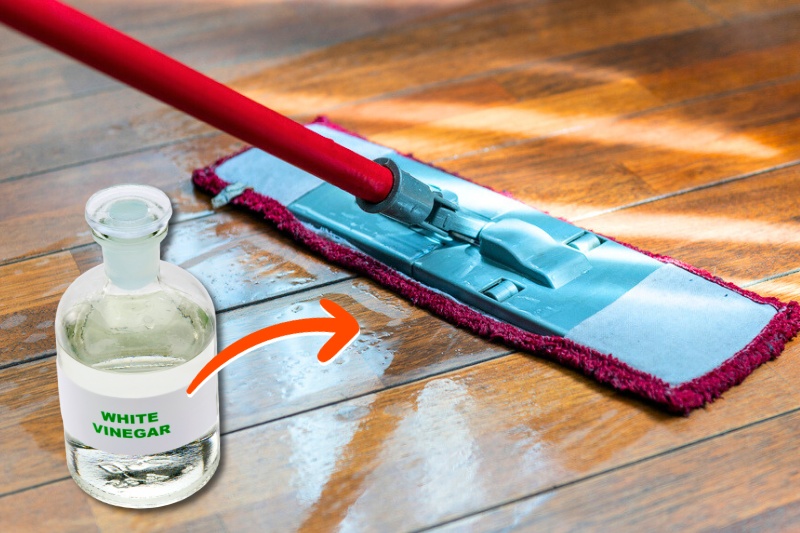
- In a bucket pop some wooden floor cleaner into lots of water – make sure the product is diluted. (White vinegar is a natural option – ½ a cup of white vinegar to 4.5 litres of warm water)
- Get a mop that can be wrung out easily/head can be replaced with a dry top.
- Start by putting a tiny amount of water onto your mop and wring out all the water.
- Do a patch test on an unseen part of your flooring first. If all works out okay, carry on.
- Glide the mop along the floor – do one area at a time.
- Then go over the area you’ve just done with a cotton tea towel to soak up excess water.
- Clean the whole floor in this manner.
- Make sure all the widows are open for ventilation.
- If you need to do some spot cleaning, use a cotton cloth to do so. Again, do not oversaturate the cloth in water, and always dry the floor once you’re done.
Cleaning Unfinished Floorboards
- Move your furniture out of the way and decide how you will clean your flooring.
- Sweep your floorboards with a soft brush.
- Running the hoover over the floor is also an option, but make sure you turn the hoover onto the ‘hard floor’ setting otherwise the brush head will mark the flooring.
- Either use a product that has been labelled ‘safe to use on unfinished floorboards’ to clean your flooring (Murphy’s Oil Soap). Or, move on to Step 5.
- Pop ½ a cup of white distilled vinegar in a bucket.
- Next, add 4.5 litres of water to the bucket.
- Get a clean mop, one that the water can be rung out of with ease.
- Dip the mop in and start mopping a test patch on the floor. If all works out well, continue.
- Make sure you pick up as much liquid from the floor as possible, as you go around moping – remember your flooring is untreated and water will soak into the floorboard.
- Wipe the floor you’ve just cleaned with a clean cotton towel to pick up any liquid, if need be.
- Follow the grain line when you’re mopping.
- Open all the windows for ventilation.
You can modify the steps above by dipping a cotton cloth into the bucket instead of a mop, and cleaning your untreated floorboards by hand. This is more time consuming, but you’ll be able to react and clear up excess water much faster.
Additionally, if you don’t want to use a bucket at all, you could create a white vinegar and water spray solution in a bottle.
Fill a quarter of a clean spray bottle up with white distilled vinegar, and fill the rest of the bottle up with water. Simply spray the solution onto the floorboards and either mop the liquid up, or use a cotton cloth and wipe the floor by hand.
One final tip, if you notice the water in your bucket of water getting dirty, you need to change the water and create a new solution. If you keep using the mucky water, you’re just putting the dirt you’ve just cleaned up back onto your clean floor!
And here’s another final tip, you probably won’t like the smell of vinegar as you’re cleaning, so add some lemon drops to your bucket/spray bottle to help with the stench!
Preventive Measures: Keeping Your Floorboards Cleaner for Longer
- Take shoes off when entering a room.
- Have a carpet so people can wipe their feet before coming into a room.
- Clean up spills and general mess as soon as possible – don’t let it fester away.
- Wipe your pet’s paws before they come into the house.
- Sweep and hoover regularly.
- Use feature rugs to cover your flooring, if you like.
- Pop soft pads on the bottom of your furniture to stop scuffs from appearing on the floor.
Floorboard Cleaning FAQs
I’ve got unfinished floorboards, should I get finished ones for my house?
There are advantages and disadvantages of both types of floorboards, and it’s entirely up to you to decide which type you prefer.
Floorboards can last years and years in most cases, but it all depends on what sort of traffic you expect to walk on the floor, and how much effort you are prepared to put into maintaining the flooring.
Check out some advantages and disadvantages of both below:
Advantages of unfinished floorboards
- Wide range of styles available
- Variety of colours available
- Can match the floorboard’s colour to other flooring, if need be
- When you decide to finish the floorboards you’ll be able to seal up any gaps.
- Wood can be seen in its natural form
Disadvantages of unfinished floorboards
- Time consuming to maintain
- Longer to install
- Can be dusty when setting the floor
- Curing time after staining is a lengthy process
Advantages of finished floorboards
- Easy to install in a home
- Can be walked on very quickly after installation
- No poor smells when being installed
- Less dust
Disadvantages of finished floorboards
- Cannot be matched as easily to other floors in the house
- Cannot always have the finish you want on your floorboards
How do I get rid of scuffs and scratches on my floorboards?
There are two options you can try: sand the scuff out or crayon it out.
Sanding is probably going to be the better option, but you must remember to go gently and easily over the floor. You don’t want to over-sand your floor or it will go wonky.
If you want to try the crayon technique, just get a crayon that matches the colour of your floor, then just colour in over the scratches.
How often should I be cleaning my floorboards?
A deep clean, like the steps mentioned above should take place every 2 months or so. However, if you’ve got a busy home and you get a lot of muddy boots and paws traipsing through your house, then you may need to clean your flooring sooner.
Although, if you take note of the preventive measures above you should be able to limit how much dirt gets onto your floor.
Is it worth me calling in a professional to clean my floorboards?
So, professional help in whatever form you need it is always going to come at a price. And this price is usually pretty steep. If you really are concerned about ruining your flooring, or you really can’t get stains and scuffs out, then it might be worth calling in an industry expert.
But you can always give the cleaning a go yourself to start off with – it’s not as hard as it sounds, it just takes time.

Bethan has a passion for exploring, reading, cooking and gardening! When she’s not creating culinary delights for her family, she’s concocting potions to keep her house clean!


