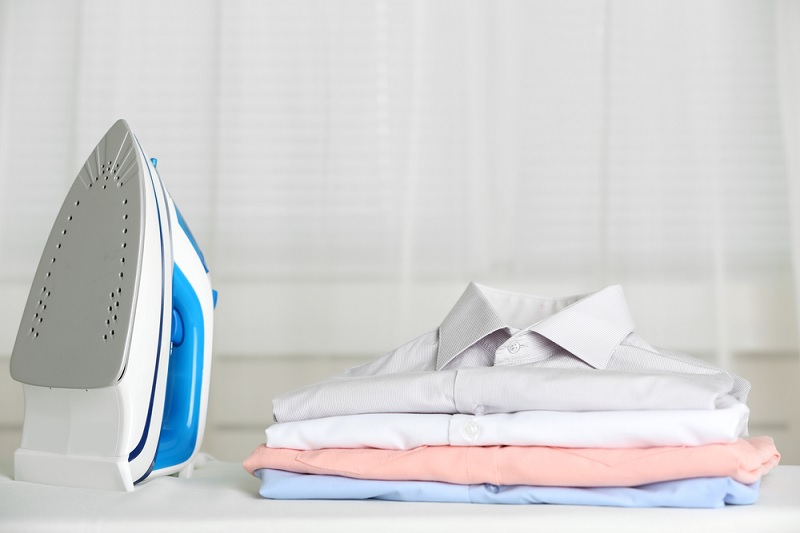
Ironing a shirt is an essential skill that can enhance your appearance and boost your confidence. And not only that—a well-ironed shirt also exudes a sense of professionalism and elegance.
However, while ironing a shirt may seem simple, achieving a crisp, wrinkle-free finish requires proper technique and great attention to detail.
In this comprehensive guide, we’ll walk you through the step-by-step process of how to iron a shirt to perfection, leaving you with a polished and dapper look for any occasion. We also share ways you can get a wrinkle-free shirt if you don’t have an iron to hand.
How to Iron a Shirt Step by Step
Here’s the best way to iron a shirt quickly and efficiently.
Step 1: Prepare your ironing station
Start by setting up your ironing board in a well-lit and spacious area. Ensure that the ironing board cover is clean and smooth to prevent any transfer of dirt or residue onto your shirt.
If you don’t have an ironing board, place a teatowel over a flat surface and use this as your “board” instead.
When setting up your ironing board, ensure it is near a power socket into which you can plug your iron. You should also set up a rail with some hangers nearby, ready to hang your freshly ironed shirts.
Step 2: Gather your equipment
You next need to gather the rest of your ironing equipment. Of course, the crucial piece of equipment is your iron.
Make sure the sole plate (the part that heats up) is clean to avoid accidentally transferring marks and stains onto your clean shirts and ensure that the iron has water inside.
You should also gather a spray bottle filled with water and a clean cloth. The water spray will help create steam to smooth out stubborn wrinkles, and the clean cloth is useful for placing on top of delicate fabrics that should come into direct contact with the iron.
Step 4: Check the fabric care label
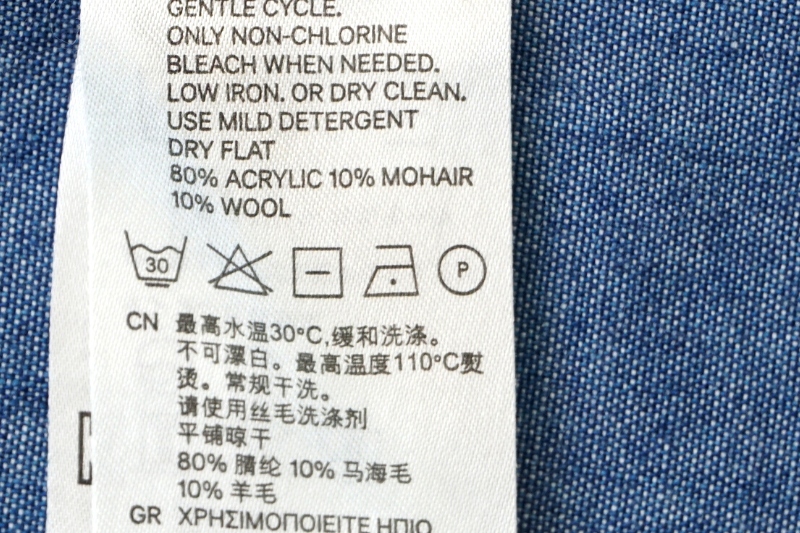
Before ironing your shirt, always check the fabric care label for any specific ironing instructions or heat settings.
Different fabrics require different ironing temperatures to avoid damage. For example, cotton shirts can withstand a higher heat than wrinkle-free shirts or those made from synthetic materials.
Here are the ironing symbols you might see on your shirt’s care label:
- Cool Iron: Iron symbol with one dot – maximum temperatures of 110°C.
- Warm Iron: Iron symbol with two dots – maximum temperature of 150°C
- Hot Iron: Iron symbol with three dots – maximum temperature of 200°C.
- Do Not Iron: Iron symbol with a cross through it – not suitable for ironing.
Turn the iron on and set it to an appropriate temperature for the material you’re dealing with. Allow your iron to reach the proper temperature before moving on to the next step.
Note: If you’re dealing with a “do not iron” shirt, see the “How Do You Iron a Shirt Without an Iron” section below for alternative solutions.
Step 5: Iron your shirt
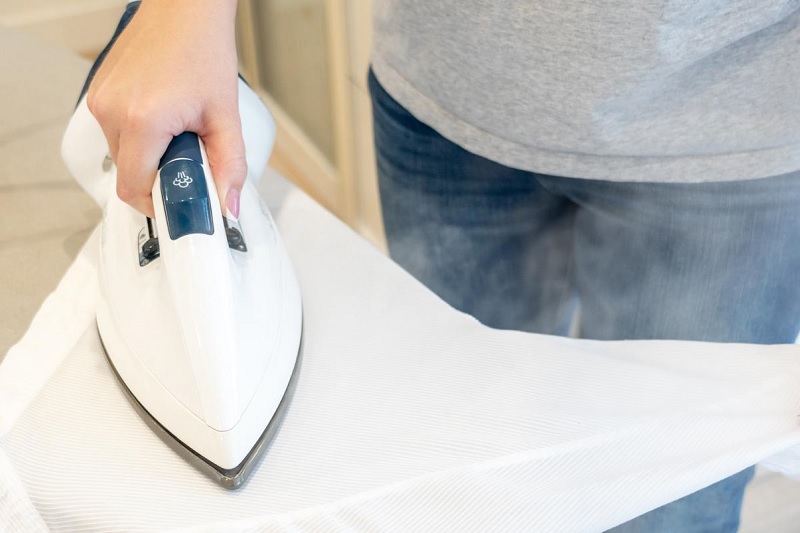
Lightly spritz your shirt using the water and a spray bottle or the steamer function on the iron.
The wetter your shirt is, the easier it is to iron out the creases. Then, unbutton the shirt and place it flat on the ironing board or other flat surface.
Run the iron over the entire shirt, starting at the collar and moving to the shoulders, sleeves, cuffs, body, and placket.
If dealing with an extremely delicate fabric (i.e. silk), iron the garment inside out to avoid scorching or burning.
You can also put another piece of material between the iron and your shirt – such as a teatowel or handkerchief – to stop the heat from directly contacting the shirt material.
Step 6: Hang & Admire
Immediately after ironing, take a clothes hanger and hang your shirt up. New creases can quickly form while the shirt is warm from the iron, so it needs to be hung properly to cool down.
This is also an excellent opportunity to check that you haven’t missed any creases. If you have, go back in with the iron while it is still hot for a perfectly wrinkle-free finish.
Is There a Correct Way to Iron a Shirt?
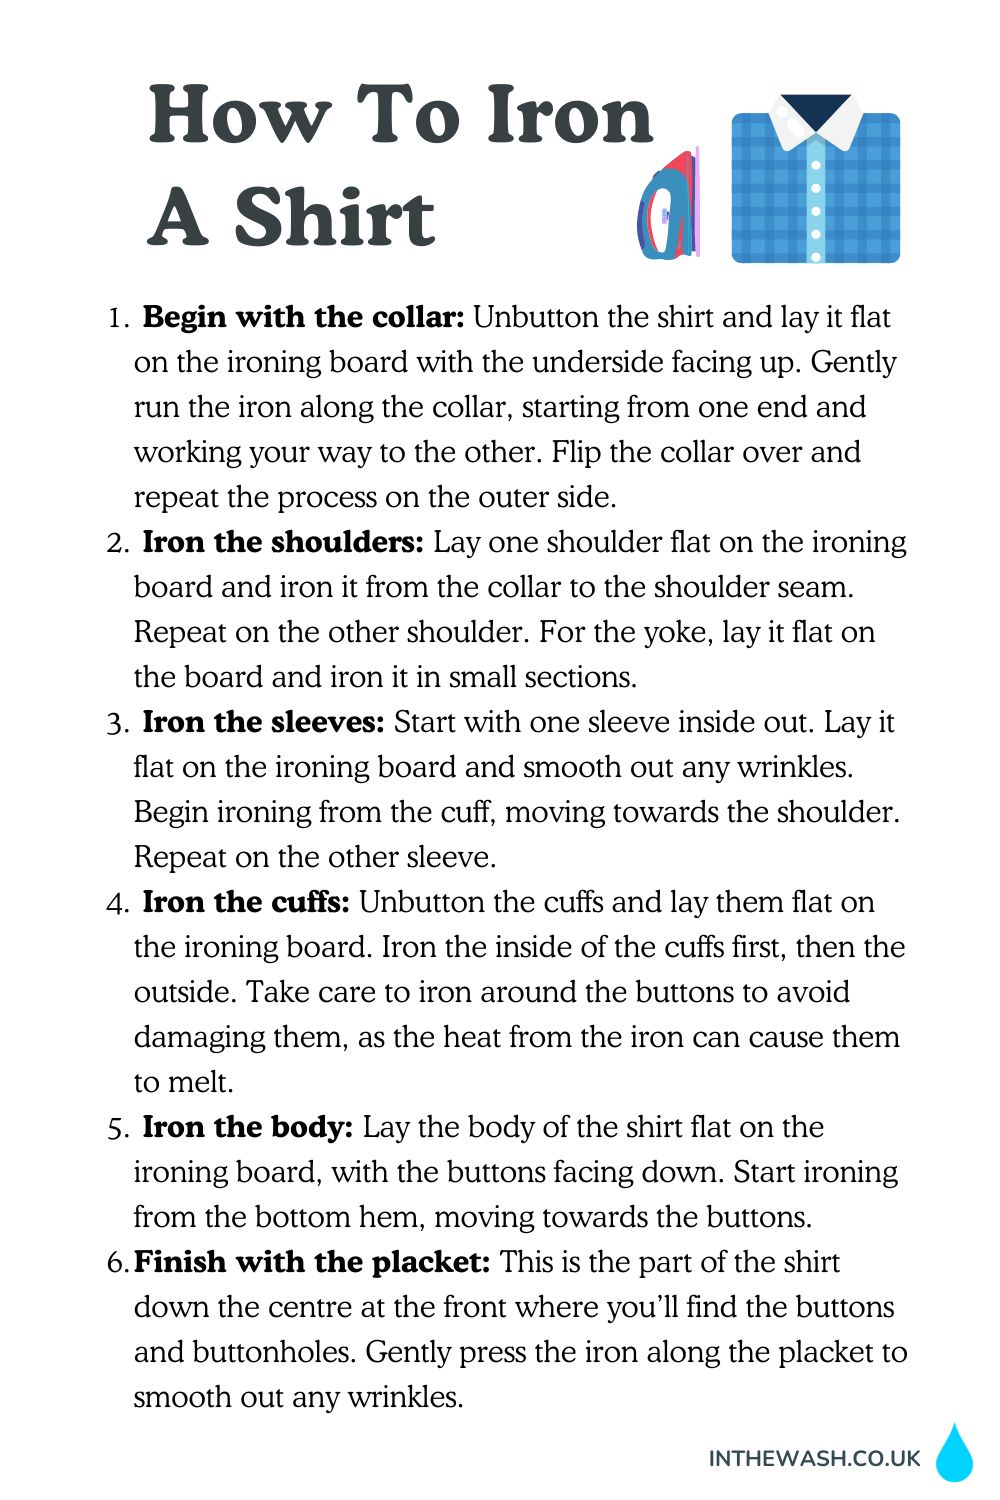
The short answer is yes—there is a correct way to iron a shirt to ensure it looks immaculate and free from wrinkles. We always recommend that you iron your shirt in this order for the best results:
- Begin with the collar: Unbutton the shirt and lay it flat on the ironing board with the underside facing up. Gently run the iron along the collar, starting from one end and working your way to the other. Flip the collar over and repeat the process on the outer side.
- Iron the shoulders: Move to the shoulders of the shirt. Lay one shoulder flat on the ironing board and iron it from the collar to the shoulder seam. Repeat on the other shoulder. For the yoke, lay it flat on the board and iron it in small sections.
- Iron the sleeves: To iron the sleeves, start with one sleeve inside out. Lay it flat on the ironing board and smooth out any wrinkles. Begin ironing from the cuff, moving towards the shoulder. Repeat on the other sleeve.
- Iron the cuffs: Unbutton the cuffs and lay them flat on the ironing board. Iron the inside of the cuffs first, then the outside. Take care to iron around the buttons to avoid damaging them, as the heat from the iron can cause them to melt.
- Iron the body: Lay the body of the shirt flat on the ironing board, with the buttons facing down. Start ironing from the bottom hem, moving towards the buttons. Be careful when ironing over the buttons so as not to create additional creases.
- Finish with the placket: Finally, iron the placket. This is the part of the shirt down the centre at the front where you’ll find the buttons and buttonholes. Gently press the iron along the placket to smooth out any wrinkles.
How Do You Iron a Shirt Without an Iron?
While an iron is the most effective tool for achieving a crisp finish, there are alternative methods for achieving a wrinkle-free shirt.
Here are six replacement methods to smooth out wrinkles and creases if you don’t have an iron available.
1. Use a hair straightener
A hair straightener can work as a makeshift iron for small sections of a shirt, such as collars, cuffs, and plackets.
Ensure the hair straightener is clean and set to a low heat setting suitable for the shirt fabric. Run the straighteners over the material to remove any small wrinkles.
2. Hang the near the shower
If you’re in a hurry and don’t have access to an iron, try hanging your shirt in the bathroom while taking a hot shower.
The steam from the shower can help release wrinkles in the shirt. Once done, smooth out any remaining wrinkles with your hands and hang the shirt to dry.
3. Use a pot of boiling water
If you’re not planning on showering anytime soon, boil a pot of water and hold the shirt over the steam.
Be cautious not to get too close to the boiling water to avoid scalding yourself. The hot steam can help relax the fabric and reduce wrinkles.
4. Use a wrinkle-release spray
Purchase a wrinkle-release spray from a store or make your own by mixing water and a small amount of fabric softener.
Spray the solution onto the shirt and gently tug on the fabric to release wrinkles. This is an excellent option for shirts made from heat-sensitive materials that cannot be ironed.
5. Hang the shirt outside
On a sunny day, you can hang your shirt outside on a clothesline to help the creases drop from the material.
The combination of sunlight and fresh air can naturally relax wrinkles in the fabric. However, avoid hanging your garments in direct sunlight, which can cause fabrics to fade.
6. Towel and press
Place the shirt between two damp towels and press down on the towels with your hands or a heavy object.
The moisture and pressure can help smooth out wrinkles. This is another brilliant option for shirts that cannot be ironed as it doesn’t rely on heat—just moisture and pressure.
Other Tips for Ironing a Shirt
- Prioritise if you’re in a hurry – If you’re in a hurry and planning to wear your shirt with a suit jacket, don’t bother ironing the entire shirt. Stick with the front body, the collar, and the cuffs.
- Don’t iron buttons and zips – Always avoid ironing any buttons and zips on the shirt. Shirt buttons are too delicate to withstand the high temperature of an iron.
- Use lower temperatures – Try ironing at lower temperatures rather than going straight to the hottest heat setting the fabric can handle. Unless the shirt is very creased, lower settings should suffice.
- Make sure you have an ironing board – Consider purchasing an ironing board if you don’t have one already. A hard flat surface is a great makeshift solution, but ironing boards are designed to be the right shape and height for fast and efficient ironing.
- Don’t leave the iron in one spot – Constantly move the iron across the shirt material as you work. Heat damage is likely if you leave a hot iron in one spot for too long.
- Ironing technique – Iron in long strokes that run the length of your shirt rather than circular motions. This helps to eliminate creases and avoids stretching the fabric.

Hannah has a passion for cleaning. She worked her way around Australia by cleaning hostels in exchange for free accommodation and used her cleaning skills to bag a job as a chalet host for a luxury ski company in France.


